Simplified Roubo Workbench Build Part 3 - Wedged Mortise and Tenon Joints
This post is part 3 in my Simplified Roubo Workbench build and covers the wedged mortise and tenon joints. For part 2 see: Simplified Roubo Workbench Build Part 2 - Laminating the Benchtop and Legs
Discussing the Wedged Mortise and Tenon Joint
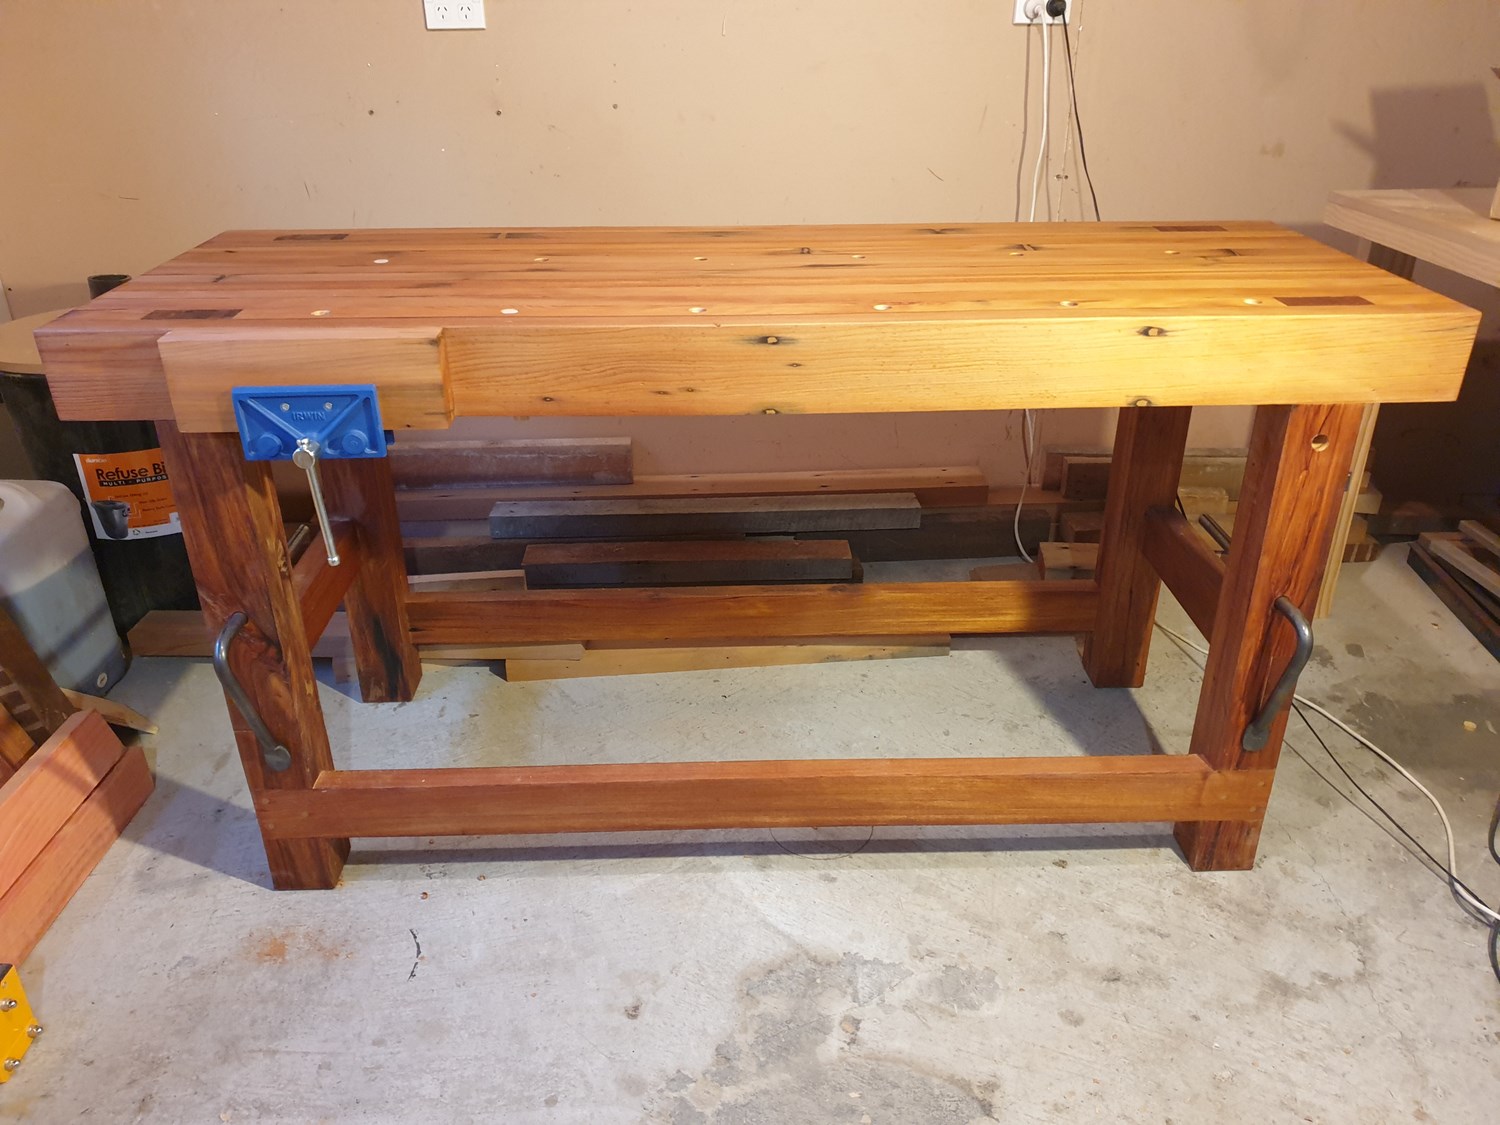
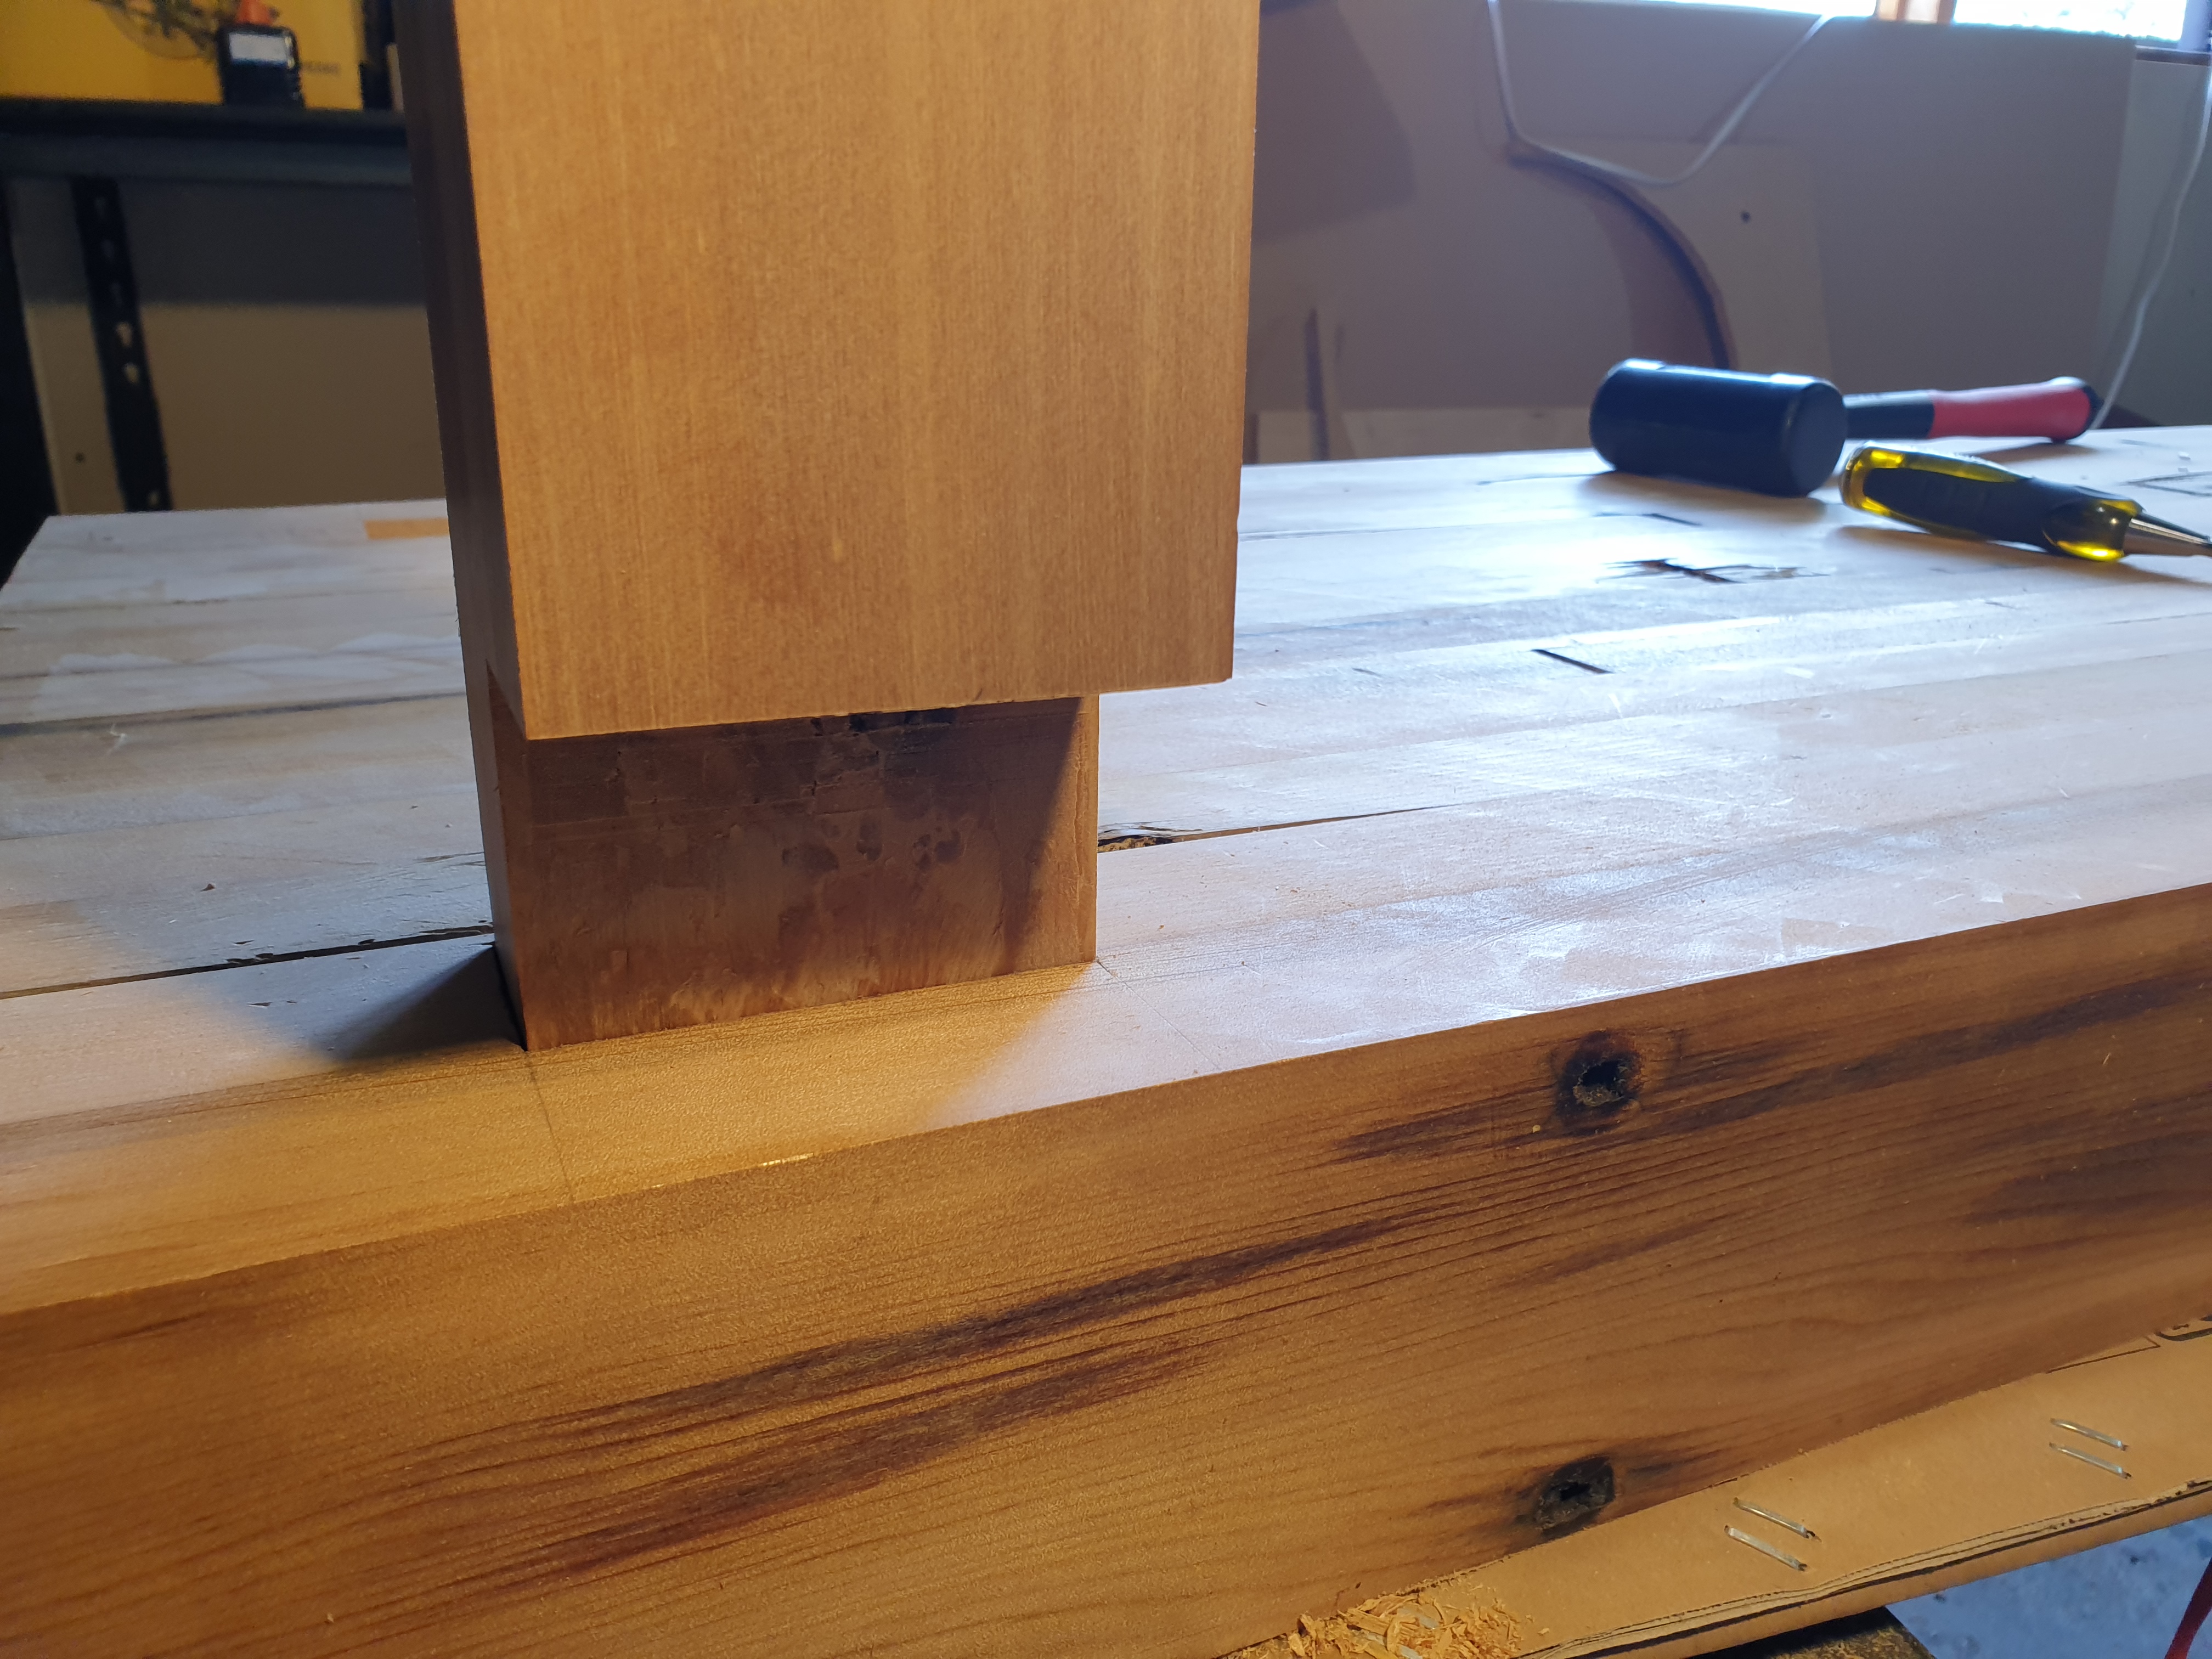
The decision to go with a wedged mortise and tenon joint between the legs and benchtop, mainly comes down to strength. I wanted a joint that would never come loose, no matter how much abuse the workbench would receive. The mortise is also a through mortise, meaning the tenon comes entirely through the benchtop. And the tenon is a barefaced tenon which means it only has one shoulder.
Cutting the Wedges
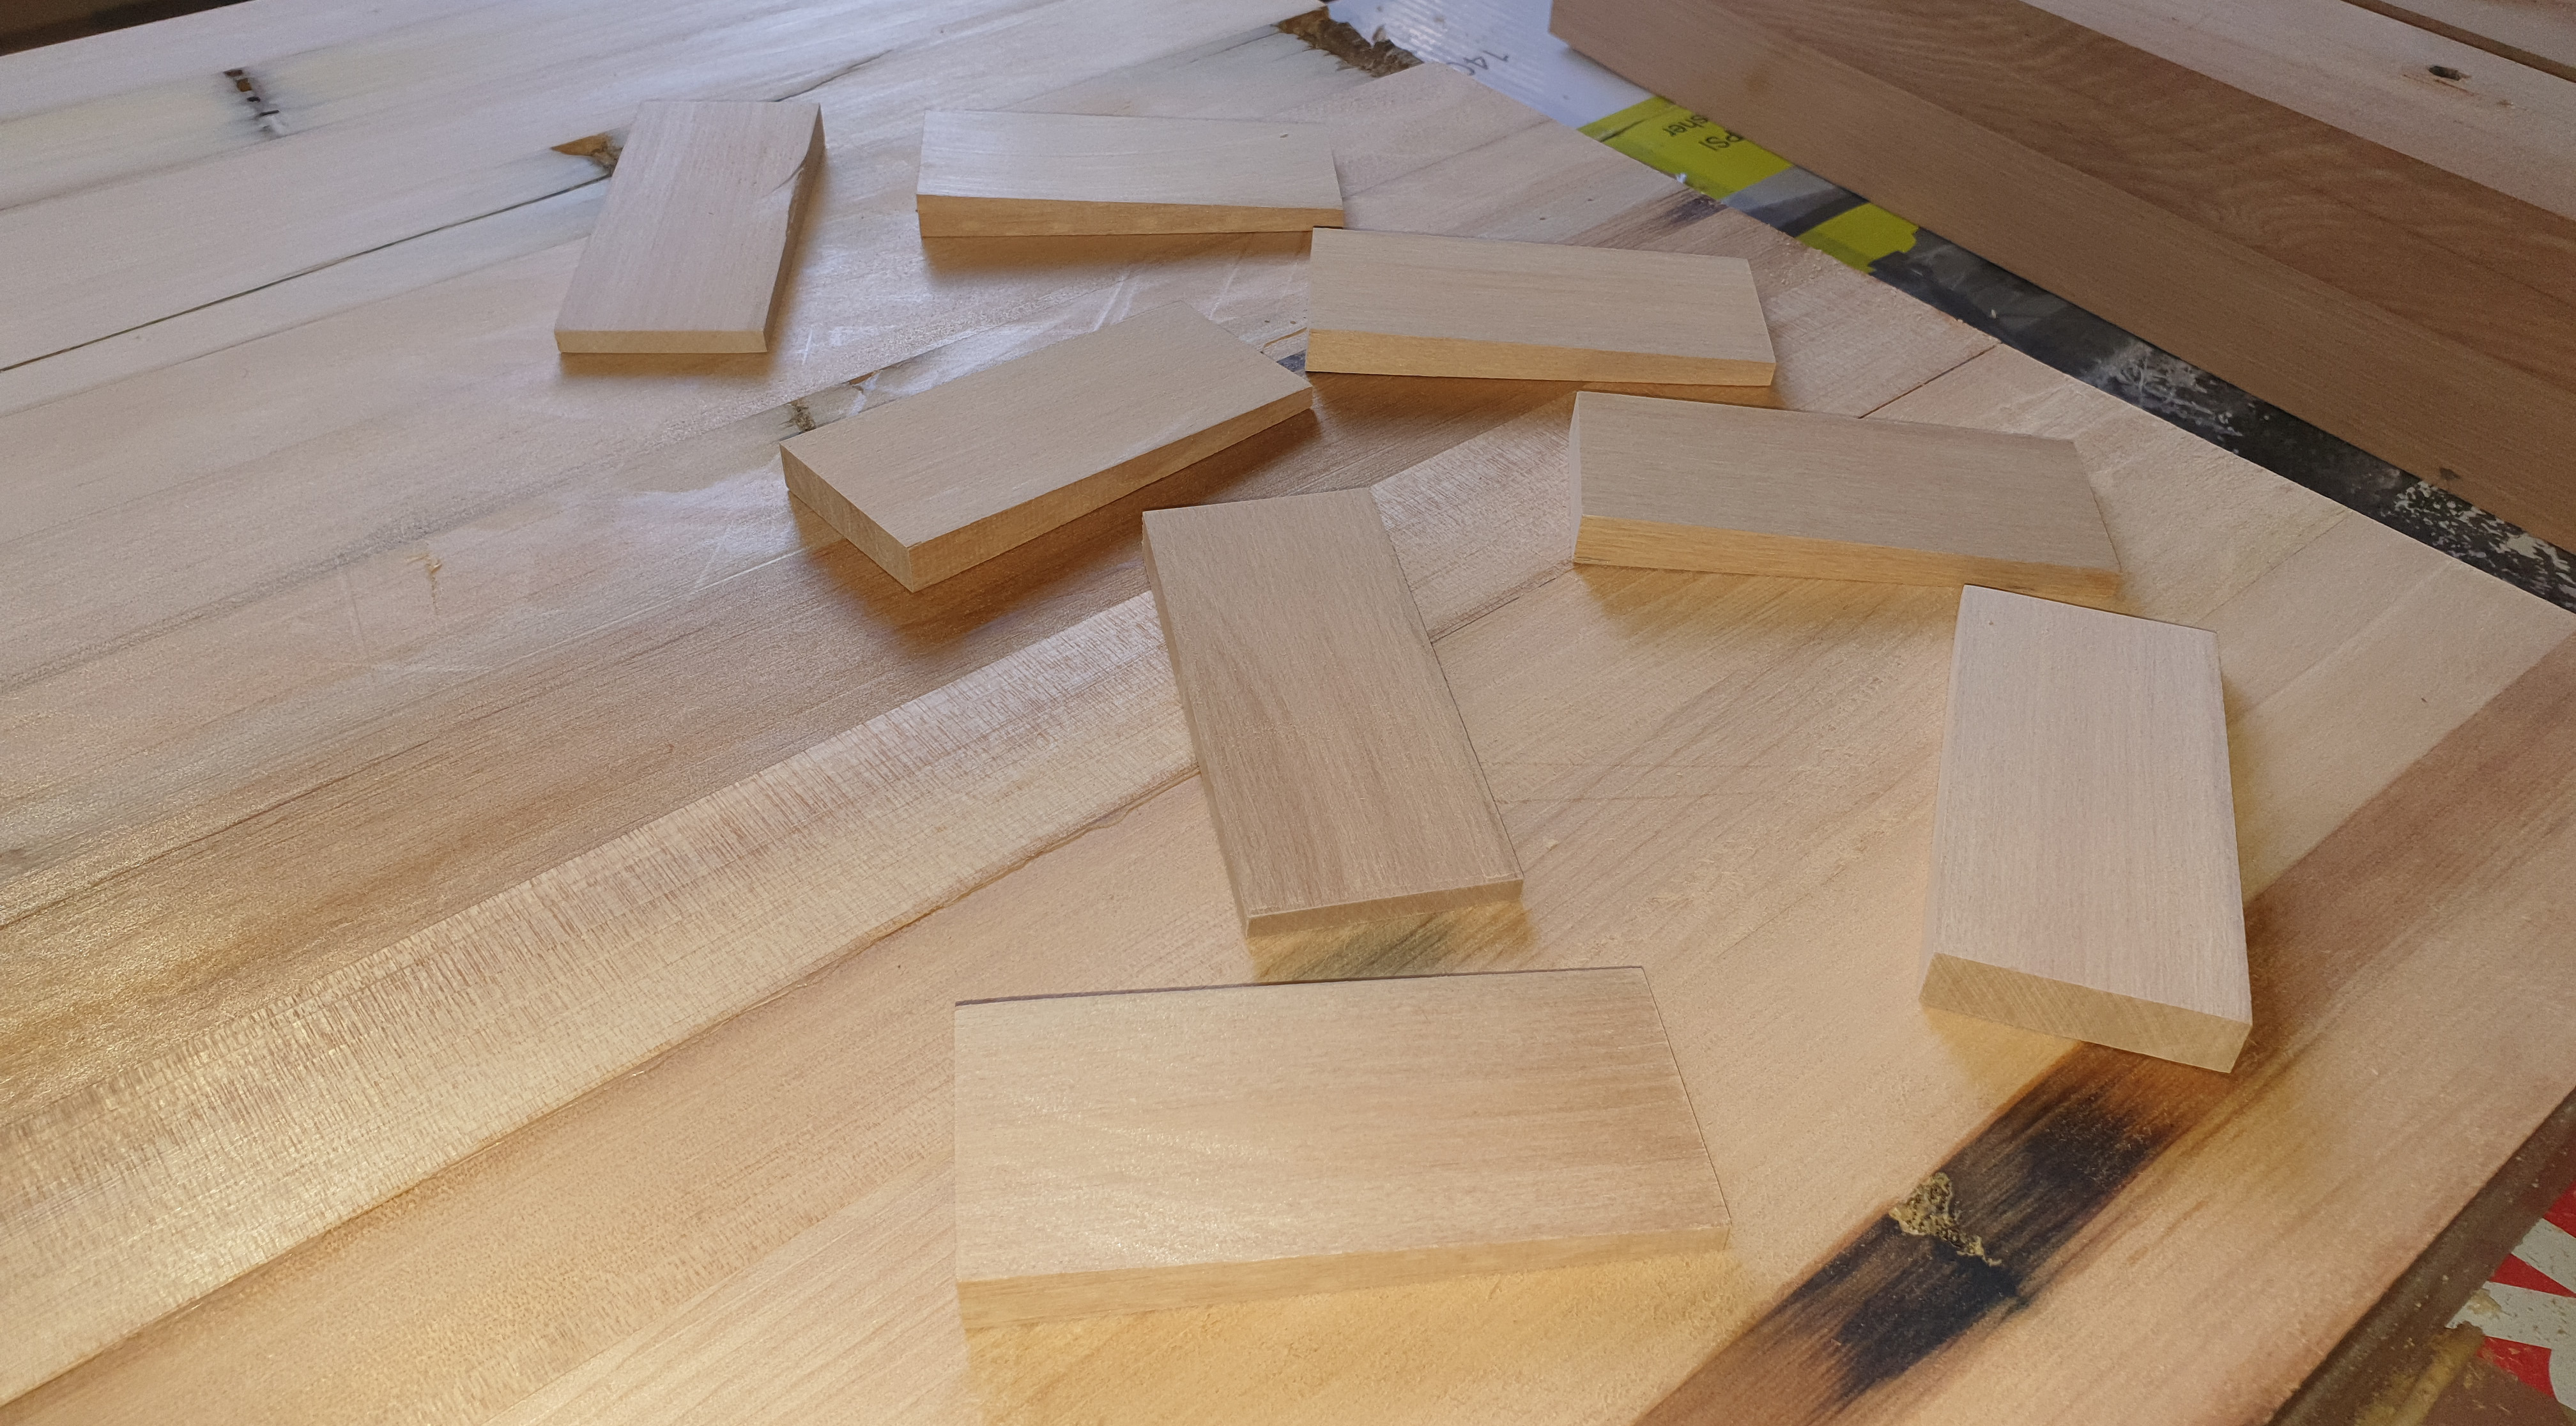
The first step I started with for the wedged mortise and tenon joints was cutting the wedges. I used my mitre saw for this but had to be careful and make sure my timber was firmly clamped. The timber I used for the wedges was Rimu, same timber as the legs. The process I followed was alternating the mitre saw angle between 0 degrees and 3 degrees as I cut each wedge.
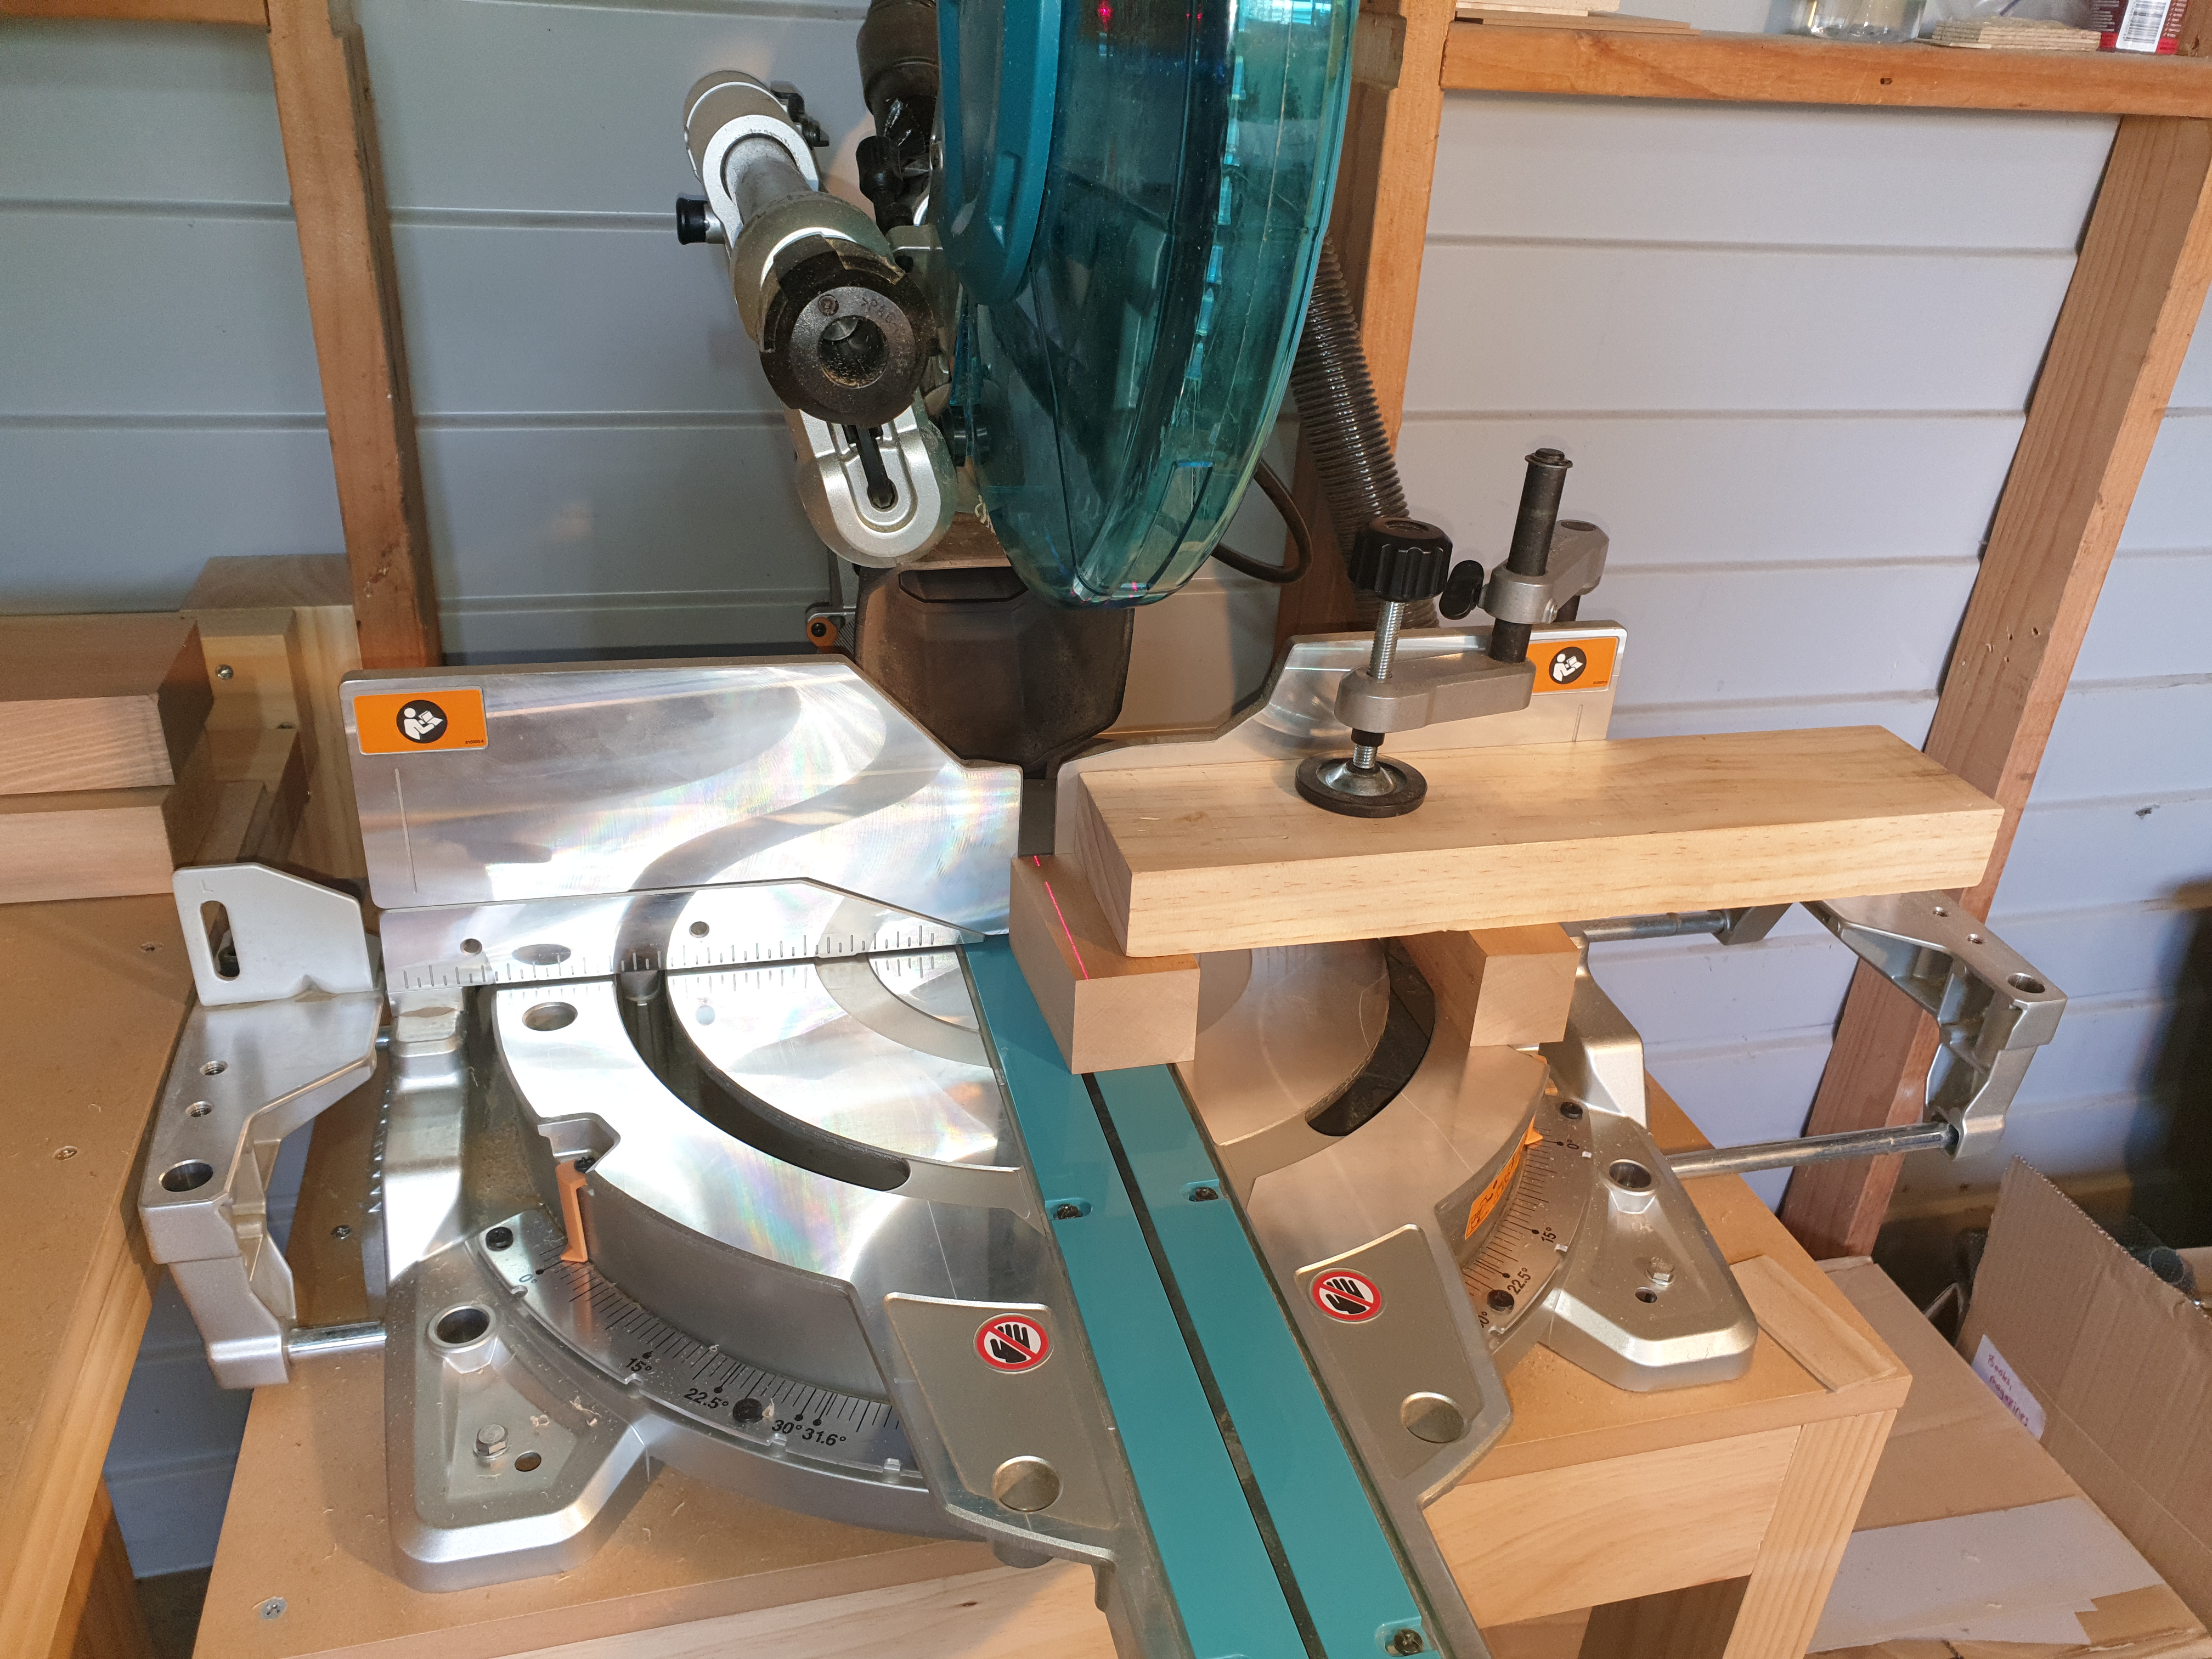
Cutting the Tenons
For the barefaced tenons, I first cut out the bulk of the offcut with a handsaw. Then it was back to the mitre saw, using the depth stop feature ready for a series of cross cuts to precisely cut the joint to the required depth. Finally, I used a chisel to clean up the tenon ready for fitting into the mortise.

Routing and Chiseling out the Mortises
For the mortises, I measured the final dimensions off the leg tenons. This way, any inaccuracies that may have been added while cutting the tenons will be accounted for. I also made sure all of the tenons were of equal dimensions. To start the mortises, I used my router with a template jig built to match the leg and tenon dimensions. The mortise template jig was a very simple construction consisting of a sheet of MDF and a strip of wood glued to the bottom as an edge guide.
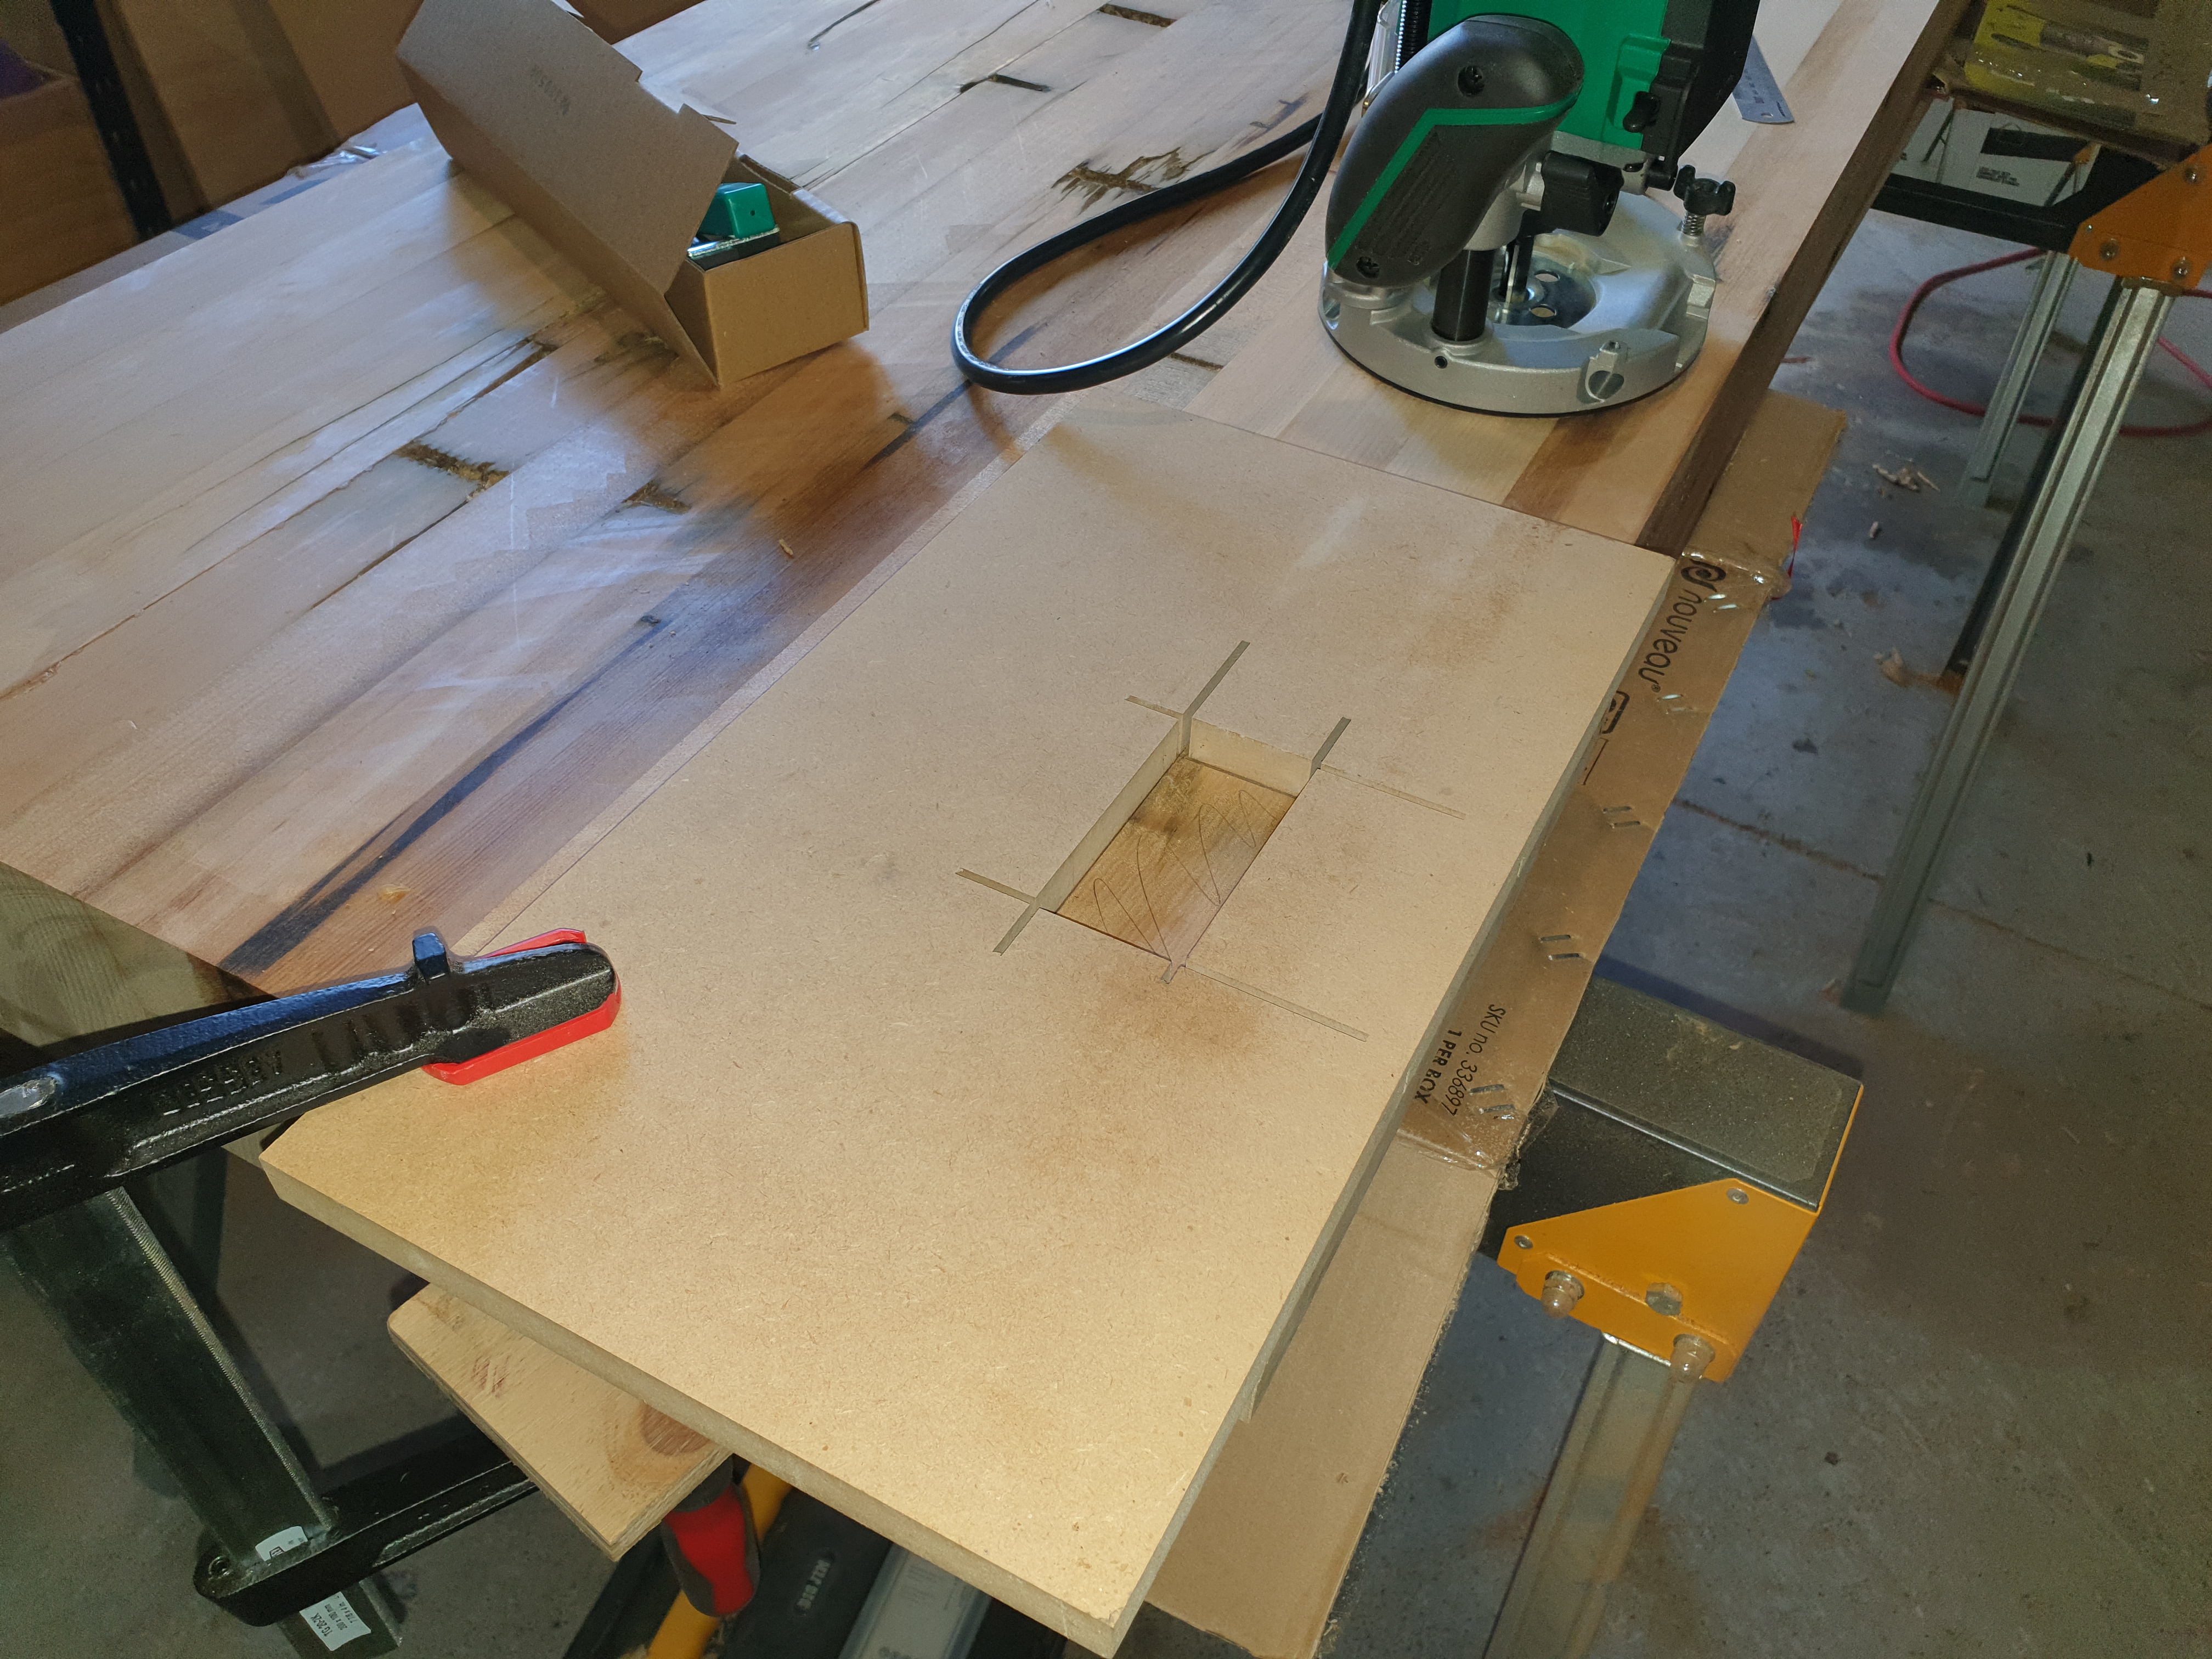
I was quite limited on the depth I could route the mortises, since my router and router bit would only allow a plunge depth of 2 inches.

Once I had routed as deep as I could go for each mortise, I flipped the benchtop over then repeated the process, being very careful to make sure the mortise position was perfectly matched up with the other side. To complete the mortises, I used a hole saw with my Dewalt drill to bore out the remaining material at the depth beyond what I could reach with my router. For the finishing touches, I used a chisel to tidy up the mortises and create square corners. I was also very careful to stay inside the edges created by the router, since there is no going back if the mortise was cut too big.
With the mortises and tenons complete, it was time for a test fit. This was a slightly nervous time given how much time and effort had gone into these joints. Thankfully all four joints were a nice and tight fit.
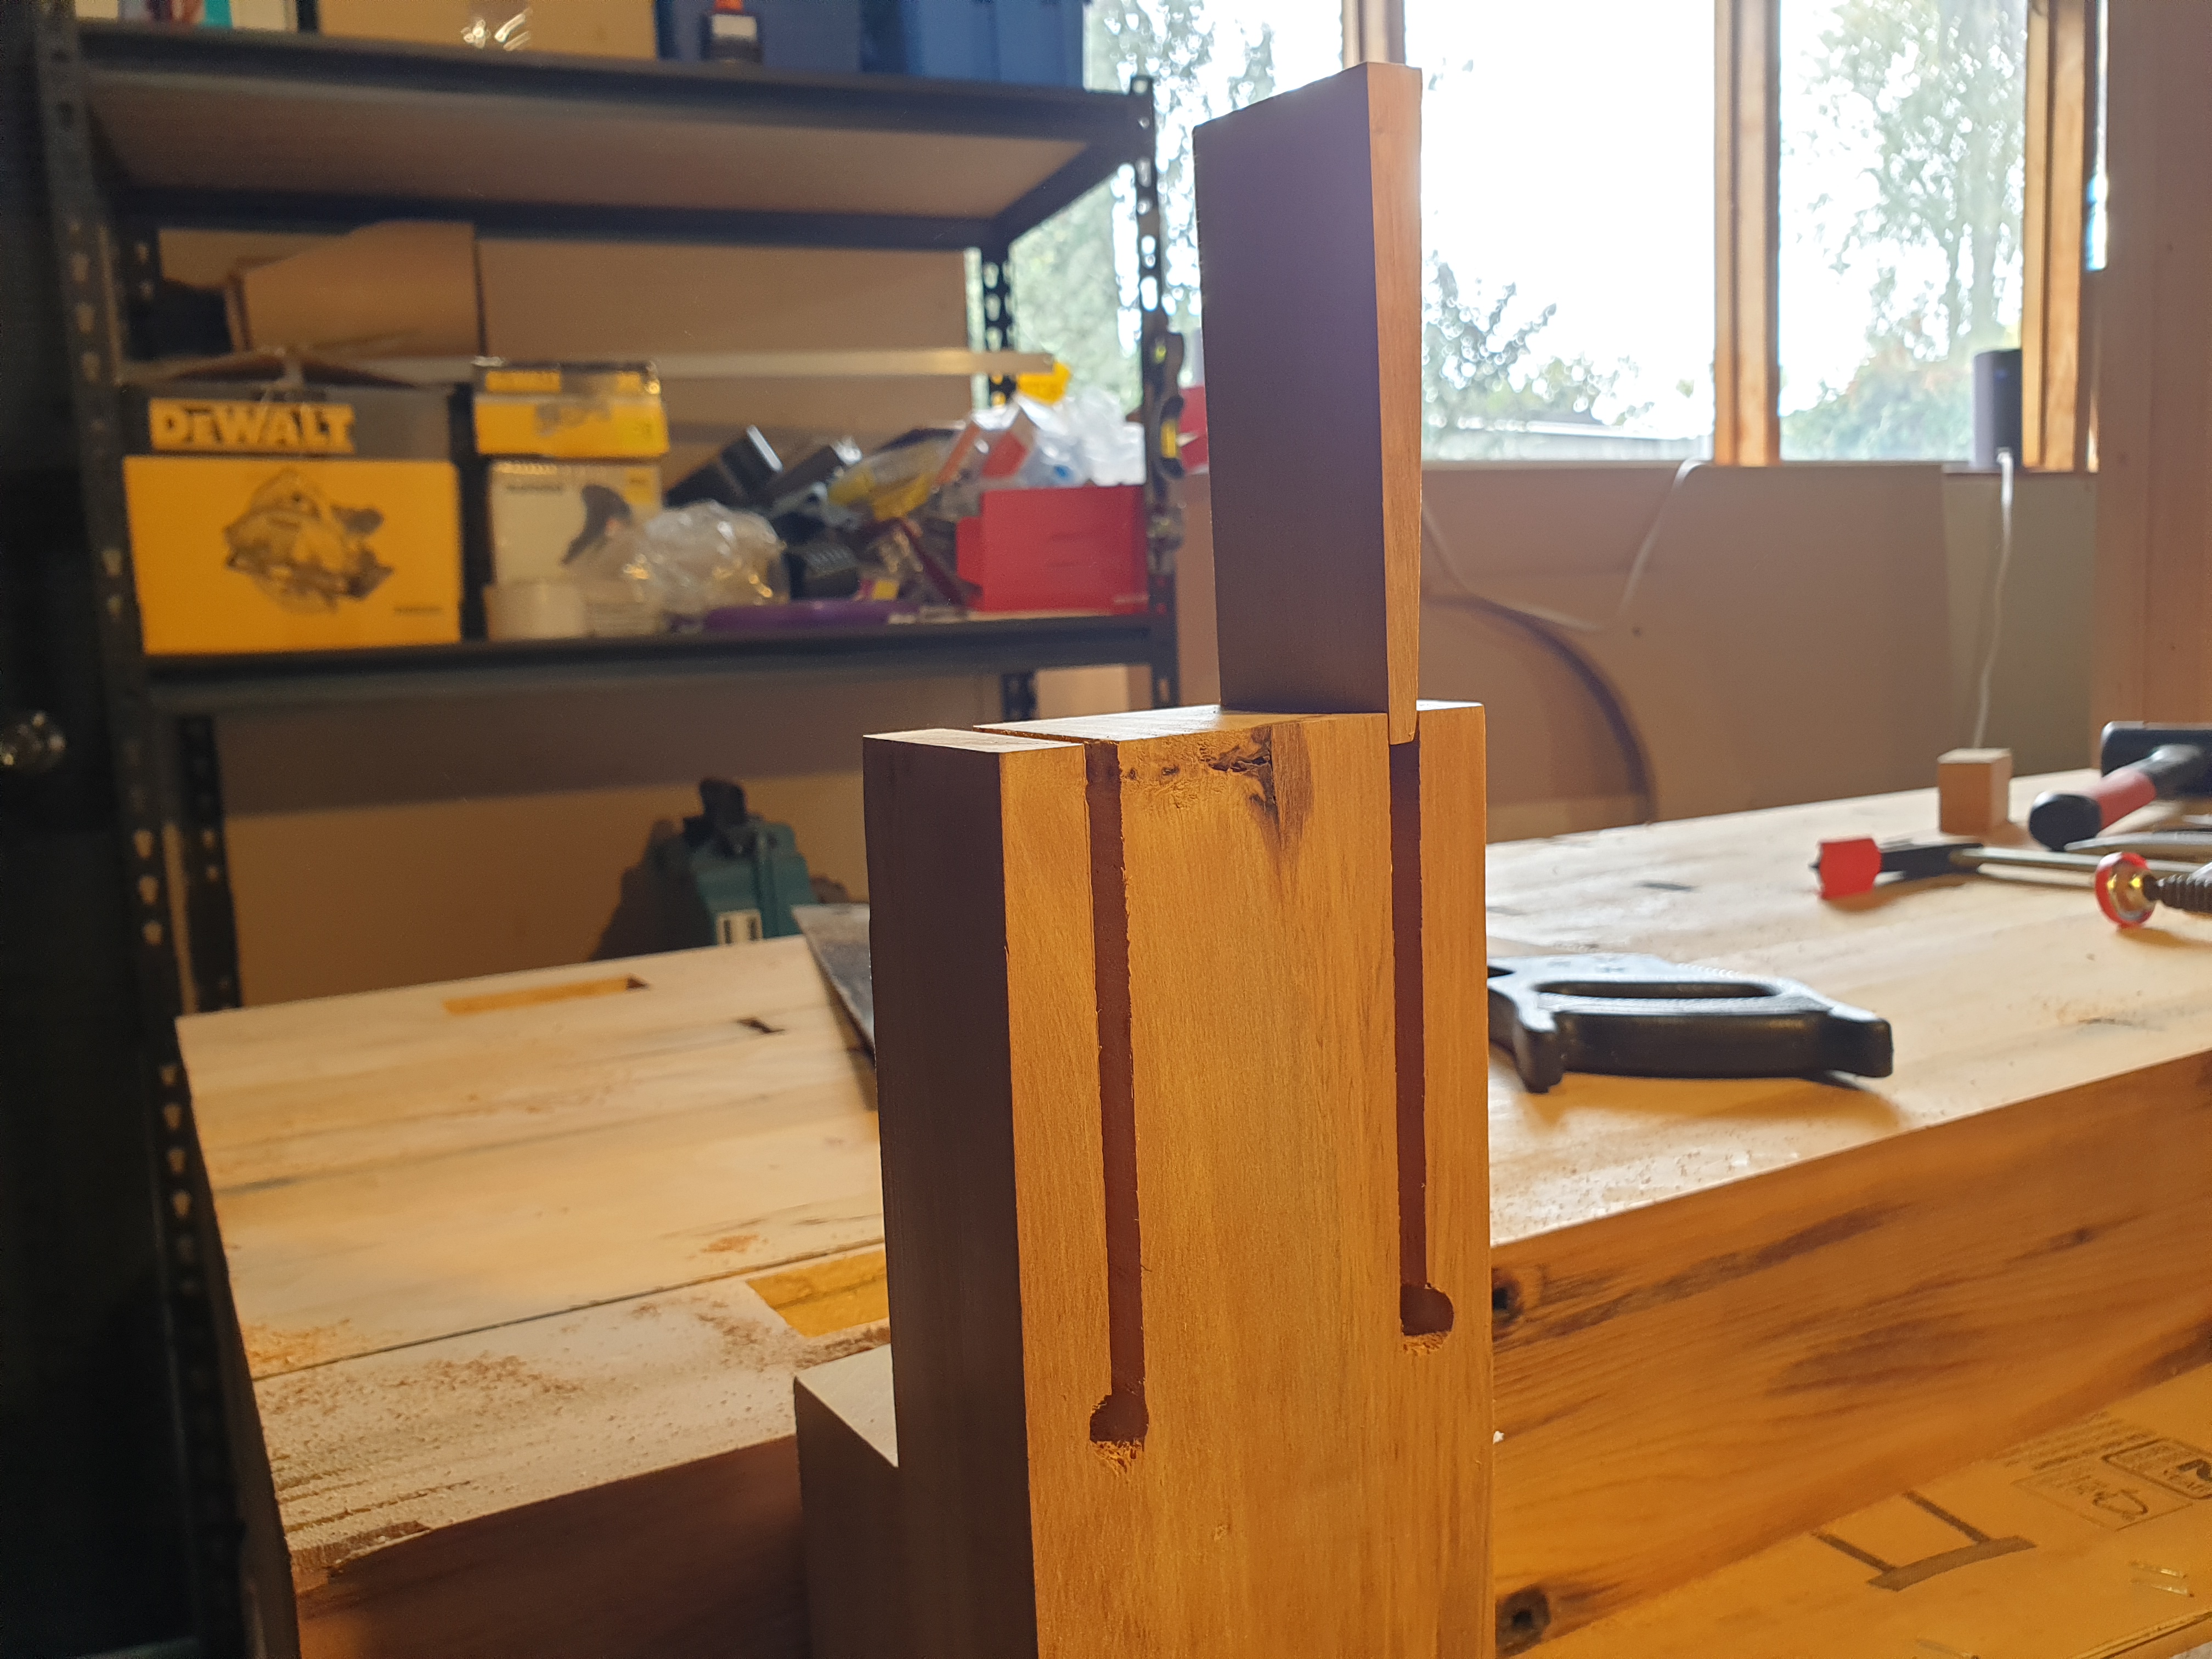
The final step in the mortise construction, was chiseling out a section on each side of the tenon sized to match the wedges. I don't have a photo that shows the mortise with the chiseled out wedge section, however, the final image at the bottom of the page should make it obvious what was required.
The final step for the wedged mortise and tenon joints, was cutting slots for the wedges. For this step, I started with drilling a strain relief hole at the bottom of each slot. The purpose of the strain relief hole is to prevent the tenon from splitting when the wedge is driven in. I cut each slot with my tenon saw, with two cuts required to match the narrowest part of the wedge. Once the slots were cut, I completed this part of the build by test fitting the wedges to make sure they would fit.
That completes part 3 of my simplified Roubo workbench build. For part 4, see Simplified Roubo Workbench Build Part 4 - Final Workbench Assembly