Simplified Roubo Workbench Build Part 1 - Design and Timber Preparation
Introduction
Most woodworkers would agree that the workbench is the most important tool in the workshop. If you are just beginning your woodworking journey, you are probably contemplating what type of workbench you should go for. And perhaps whether you should build or buy? If you have the time and patience, I strongly suggest you build. By building your workbench, you will be able to customize the dimensions for your body height and available workspace. You will also learn some valuable woodworking skills that you will no doubt use again in the future.
In this post I will cover the latest workbench that I built, why I went for a Roubo style design and how my previous workbenches influenced this decision.
Workbench Research and Design
Before I discuss the design for my latest workbench, I will take a couple of steps back and discuss my previous two work benches.
My first workbench was built very quickly by nailing together some old 4x2s and a sheet of plywood that a previous tenant had left behind in my garage. To begin with I remember being very pleased with my bench, but it wasn't long before I realized that due to it's light weight, it would start moving around when doing any heavy work on it. Some of my nailed joints also started to wobble a bit. The solution to these problems was to anchor bolt my workbench to the concrete walls of my garage - not an ideal solution. I also remember the thin plywood top being a bit bouncy when hammering or doing other heavy duty tasks.
For my second workbench, I made a few improvements. Instead of nailed joints, I used screws and glue which held my joints together better. For the bench top, I used a sheet of MDF which was thicker and heavier than the plywood top on my first bench. I also added stretchers and a shelf which added further rigidity to the bench. Overall, this workbench was a good improvement on my first bench. It wasn't long, however, until I ended up screwing my workbench to the garage wall to prevent it from moving around when doing any heavy work. Thankfully the garage in my new house had wooden framing on the walls so I did not have to resort to anchor bolts like for my first workbench.
Fast forward quite a few years, plus a break from woodworking while living overseas, it was time for a new workbench as my first step back into my hobby. I wanted to improve on the design of my previous two workbenches and build a workbench that I will have for years to come. And so began my workbench research and design phase. I purchased a book called "Workbenches from Design & Theory to Construction & Use" by Christopher Schwarz. I highly recommend this book for anyone planning on building a workbench. It covers everything from the basics of workbench design right through to workbench maintenance and accessories. The book also discusses four different workbench designs and includes plans for each - The English Workbench, The Knockdown Nicholson, The French Workbench and The Ancient Roubo. From all of these designs I found myself drawn to the Ancient Roubo. At first, I was slightly put off by it's massive size but soon realized this would solve some of the problems of my previous workbenches. The heavy weight of the Roubo would mean I would no longer need to secure my workbench to the wall to prevent it from moving around and the thick top would resolve the "bouncy benchtop" issues I had with me previous workbenches. In social media and YouTube I had also noticed that many woodworkers had started building Roubo workbenches and realized there must be a reason why. My decision was made - I would build a Roubo workbench.
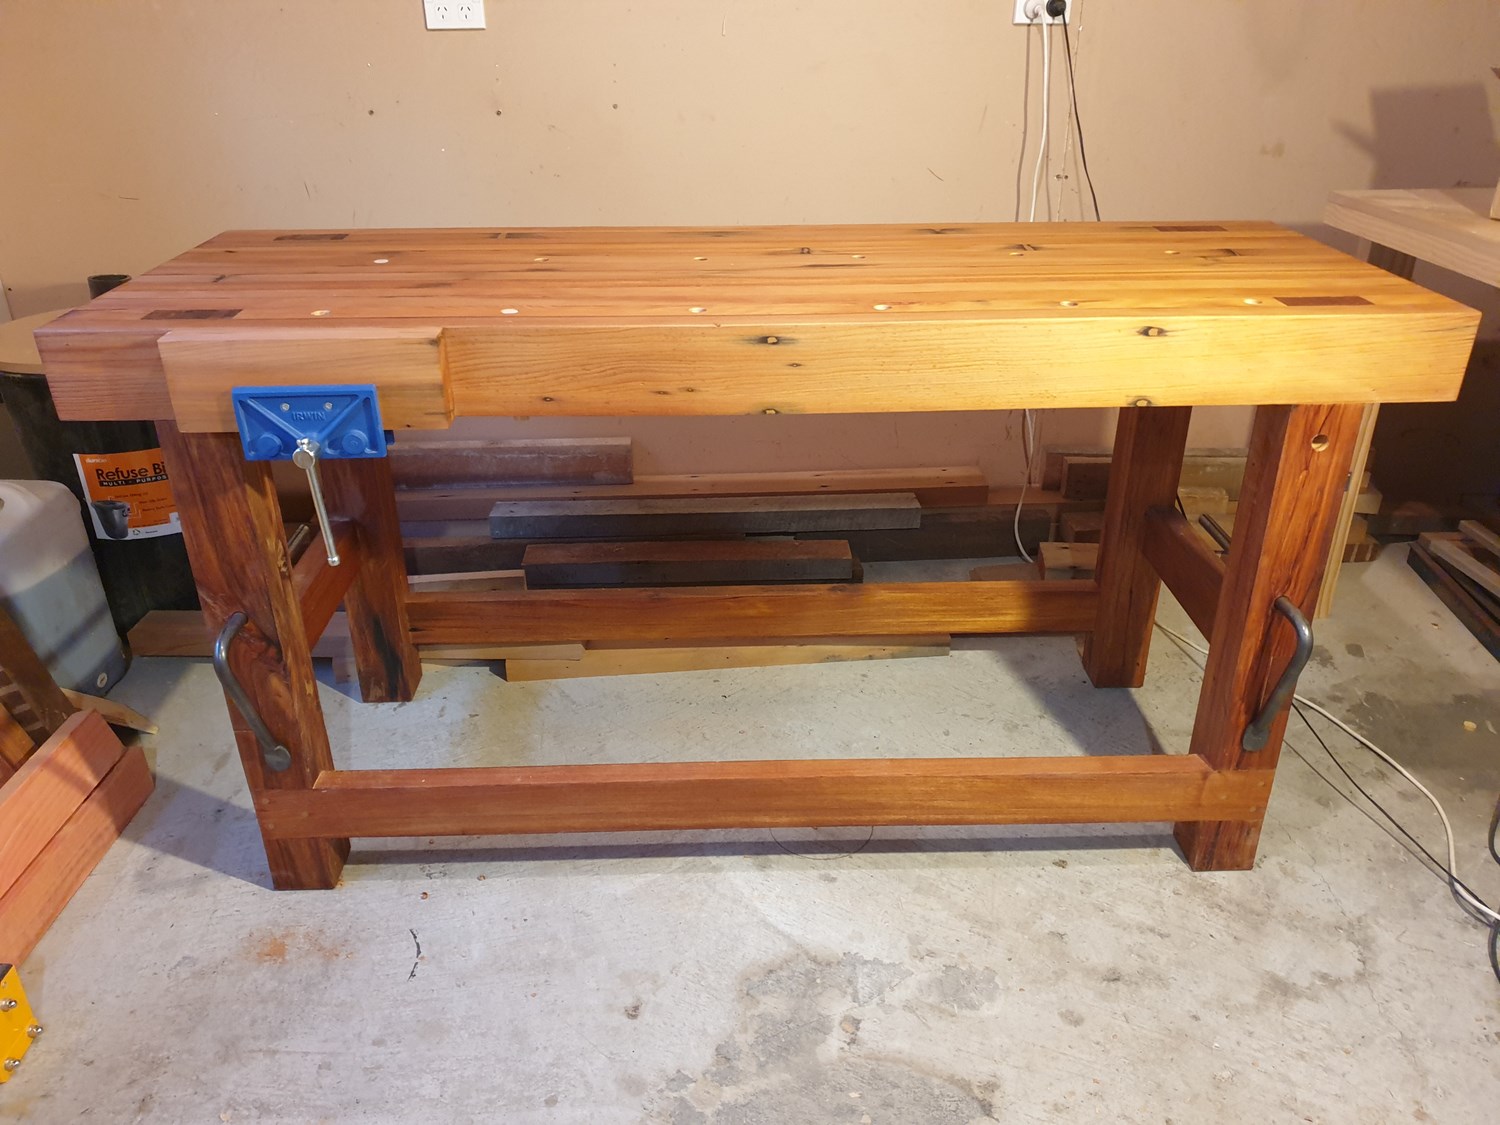
Initially I planned on building the full Ancient Roubo according to the plans in Christopher Schwarz's Workbenches book. The main components and features being a large 6" top, 5 1/2" x 4" legs with sliding dovetail joints, stretchers with mortise and tenon joints, leg vise, tail vise, shelf and dog holes. It soon dawned on me that this bench was going to take quite a while to build so I decided to simplify the design. To get my woodworking venture underway again, the first projects I was planning on were cutting boards and knife blocks. I certainly did not need a tail vise or leg vise for these projects so removed the tail vise from the design and decided to go with a standard face vise instead of a leg vise. And by removing the tail vice, this allowed the workbench to have symmetrical design without a larger distance between the legs and end of the benchtop on the tail vise end. Next, I looked at alternatives to the sliding dovetail joints that attached the legs to the top. A simpler alternative that also provided a strong and robust joint was the wedged mortise and tenon. This joint also looks very nice although not quite as impressive as the sliding dovetail. I had never made a wedged mortise and tenon joint so decided this would be a good opportunity to get some experience with it. I could also see myself using this type of joint on other projects in the future. The final simplification, that I did not 100% decide on at this stage, was using basic lap joints instead of mortise and tenon joints on the stretchers. My plan was to see how the project was tracking when I got to this part of the build and then decide which joint I would go for.
For the overall workbench dimensions, the consensus appears to be that you should make your bench long as your workspace allows, but don't overdo the width. If your workbench is positioned against a tool wall, the width should allow you to easily reach your tools. A very wide bench would also make it difficult to reach tools or other items that have shifted to the far side of the bench. The width I went for was 24" (60cm). My initial plan for the workbench bench length was to make it 6' (180cm) but due to lack of space in my single garage workshop, I reduced this down to 5' 7" (170cm). For the bench height, it depends on a few factors such as the type of work you are planning on and your body height. To put it it simply, the bench height should be whatever works for you. There is also a "pinky" rule, which suggests that the bench height should be equal to the distance from the knuckle above your pinky finger to the floor. For my bench I went with a height of 34" (86cm). This is slightly taller than what the pinky rule suggests but felt like a more comfortable height.
Here is a summary of the workbench design I settled on:
- Overall dimensions: 5' 7" x 24" x 34" (170cm x 60cm x 86cm) l x w x h
- Bench top dimensions: 5' 7" x 24" x 5" (170cm x 60cm x 12.7cm) l x w x h
- Leg dimensions: 4" x 4" x 34" (10.16cm x 10.16cm x 86cm) w x w x h
- Long stretcher dimensions: 60" x 2" x 4" (150cm x 5.08cm x 10.16cm) l x w x h
- Short stretcher dimensions: 24" x 2" x 4" (60cm x 5.08cm x 10.16cm) l x w x h
- Leg to benchtop joints: Wedged Mortise and Tenon
- Stretcher to leg joints: Lap joint (or Mortise and Tenon if time permits)
- Bench vises: Face vise only
Timber Sourcing and Preparation
The first decision I made before choosing the timber for my workbench, was whether I would go for a single slab or laminated benchtop. I soon discovered that a single slab of timber in the dimensions I needed, was going to be difficult to find in my local area and could also end up very expensive. My next option was to build the top by laminating (gluing) together several lengths of timber.
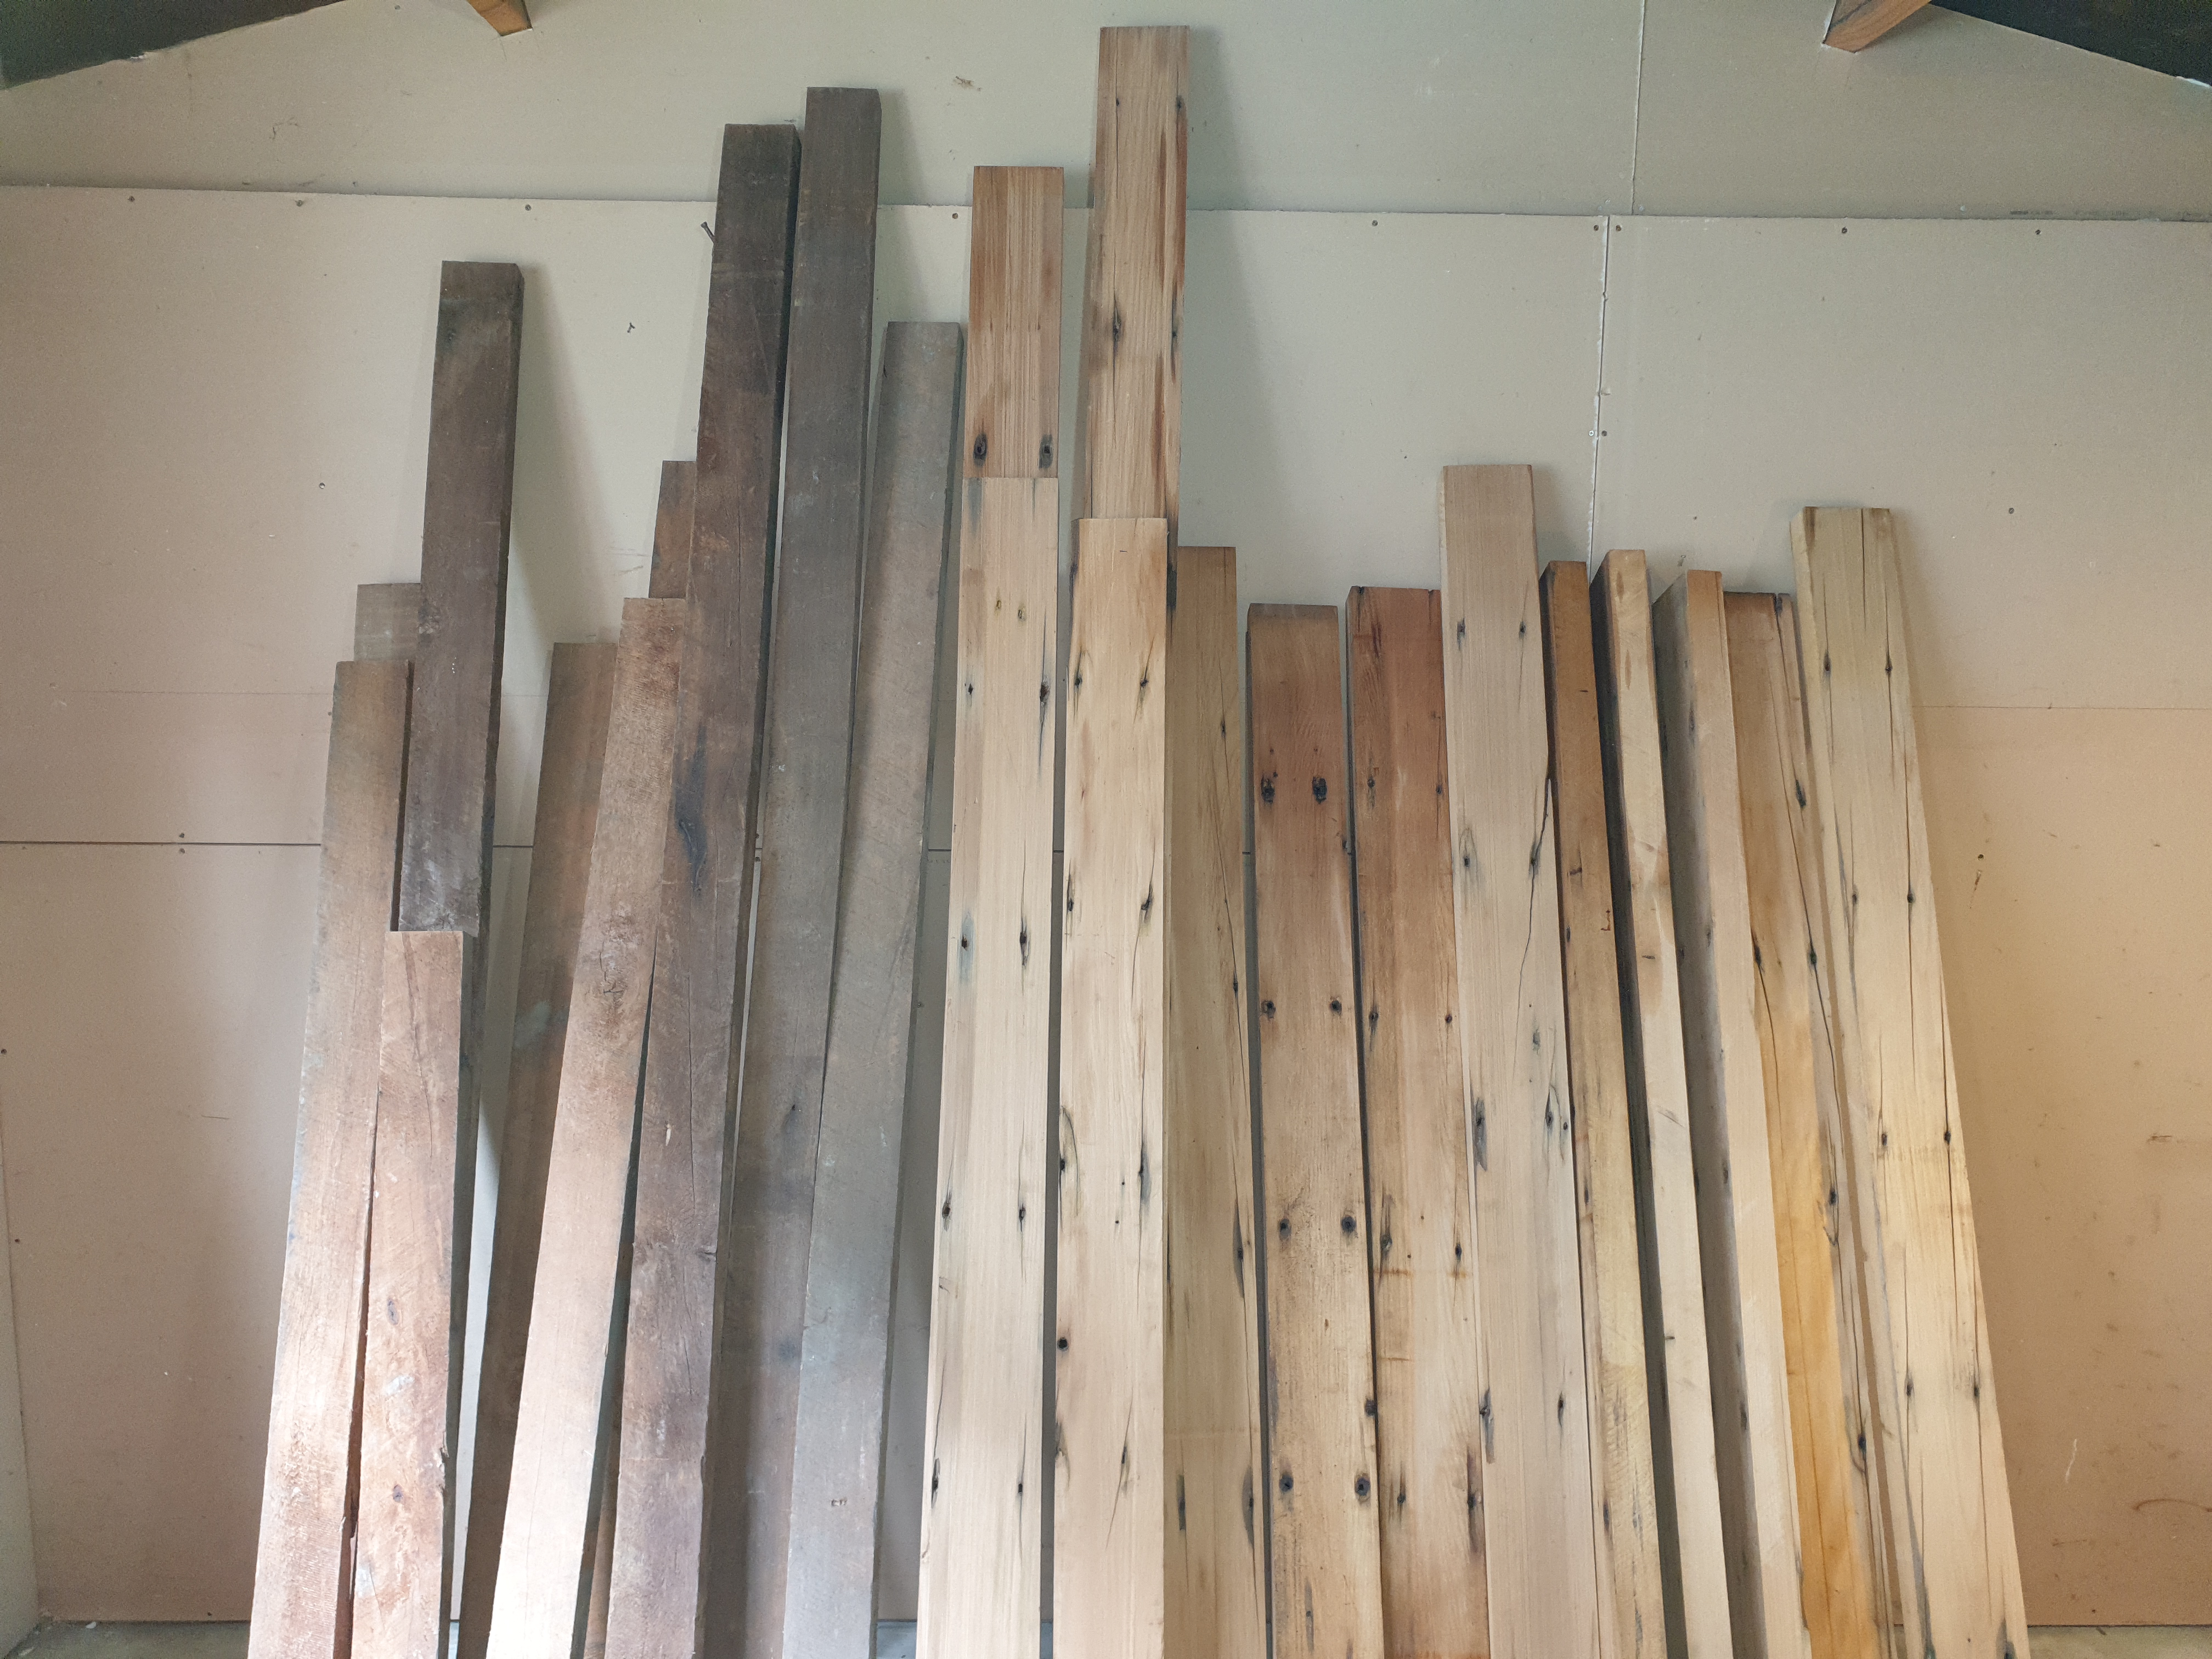
One goal I had for this workbench, was to build it from native New Zealand timber, since this felt very fitting for the "Kiwi Workshop". I narrowed the choice of timber down to either Rimu or Kauri for the benchtop due to their structural properties. Somewhere I remember reading that a lighter colored timber is preferable for a workbench top, since it provides a good sighting background against measurement lines on tools. Kauri therefore became the first choice for the benchtop since it's lighter than Rimu, especially when finished. One problem with a Kauri top was going to be the availability of the timber. Sadly, Kauri has become a threatened species due to the Kauri dieback disease which has been spreading in New Zealand Kauri forests. If I was going to use Kauri for my workbench top, it was going to have to be reclaimed timber and it didn't take long to track some down. At one of my local timber yards, Musgroves, they had a decent supply of reclaimed Kauri at 125mmx50mm (5" x 2"). Musgroves also have a good supply of reclaimed Rimu, so at this point I decided to make the entire workbench from reclaimed timber. I knew I was going to have to check the timber for nails or other metal objects before planing, but as a bonus, the timber would be well acclimated. For the workbench legs at 4" x 4" (10cm x 10cm), the best I was going to be able to do with the reclaimed Rimu available was to laminate together two 4x2s.
Having decided on the timber I would use for my workbench, I calculated how much I would need and made a trip down to Musgroves. The reclaimed Kauri has quite a few splits and nail holes, so it took some time to pick through the stack and find some suitable lengths. It was a similar story with the Rimu. One tip I have when buying reclaimed timber, is to ask about the history of the timber. Sometimes you will get an interesting story which can add something special to your project. The story behind the reclaimed Kauri I purchased for my benchtop, is that it came from the iconic Harvey Norman Centre building in central Christchurch when it was undergoing repairs after the Christchurch 2011 earthquake. The photo above shows all the timber I purchased for my workbench, with the Kauri on the right and Rimu on the left.
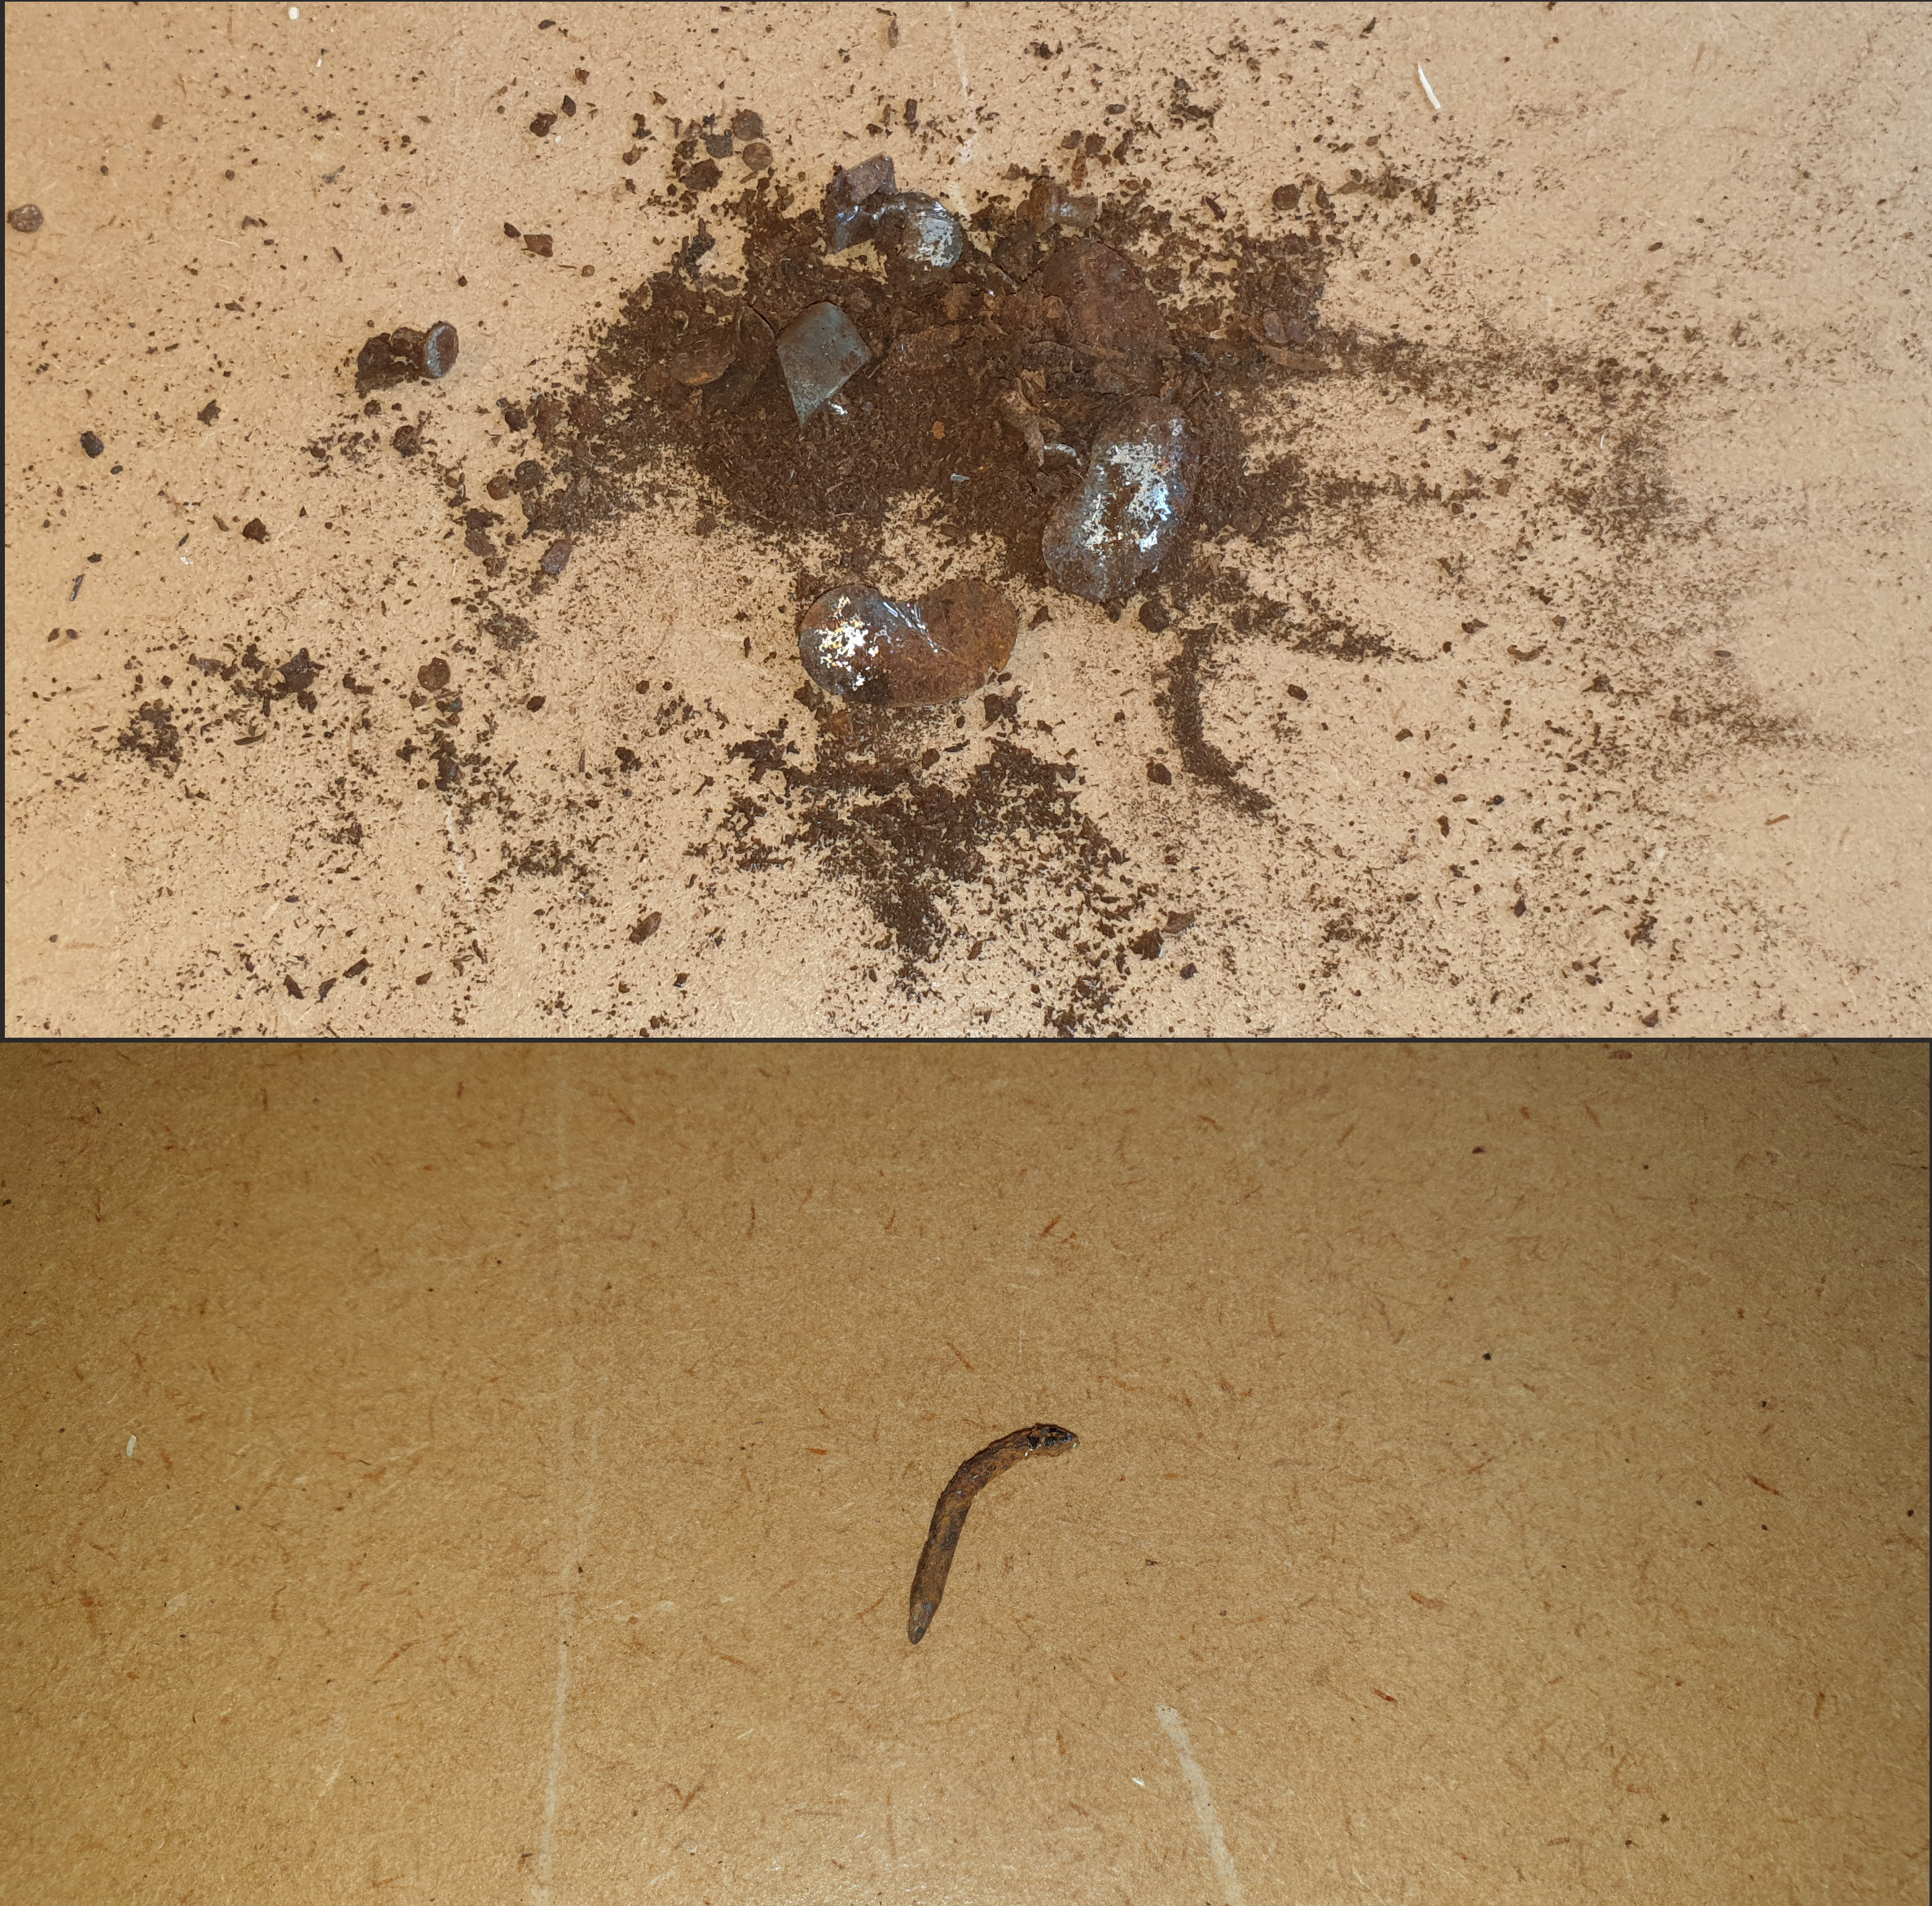
Before I could proceed with jointing and planing my timber, I had to check it for nails or other metal objects. For this task, I purchased a small hand-held metal detector. It wasn't specifically a woodworking metal detector but it did the trick. This image shows some examples of the nails and other metal objects I removed from my reclaimed timber. I was very pleased to have these removed since they would have damaged the blades on my thicknesser (planer) and hand plane.
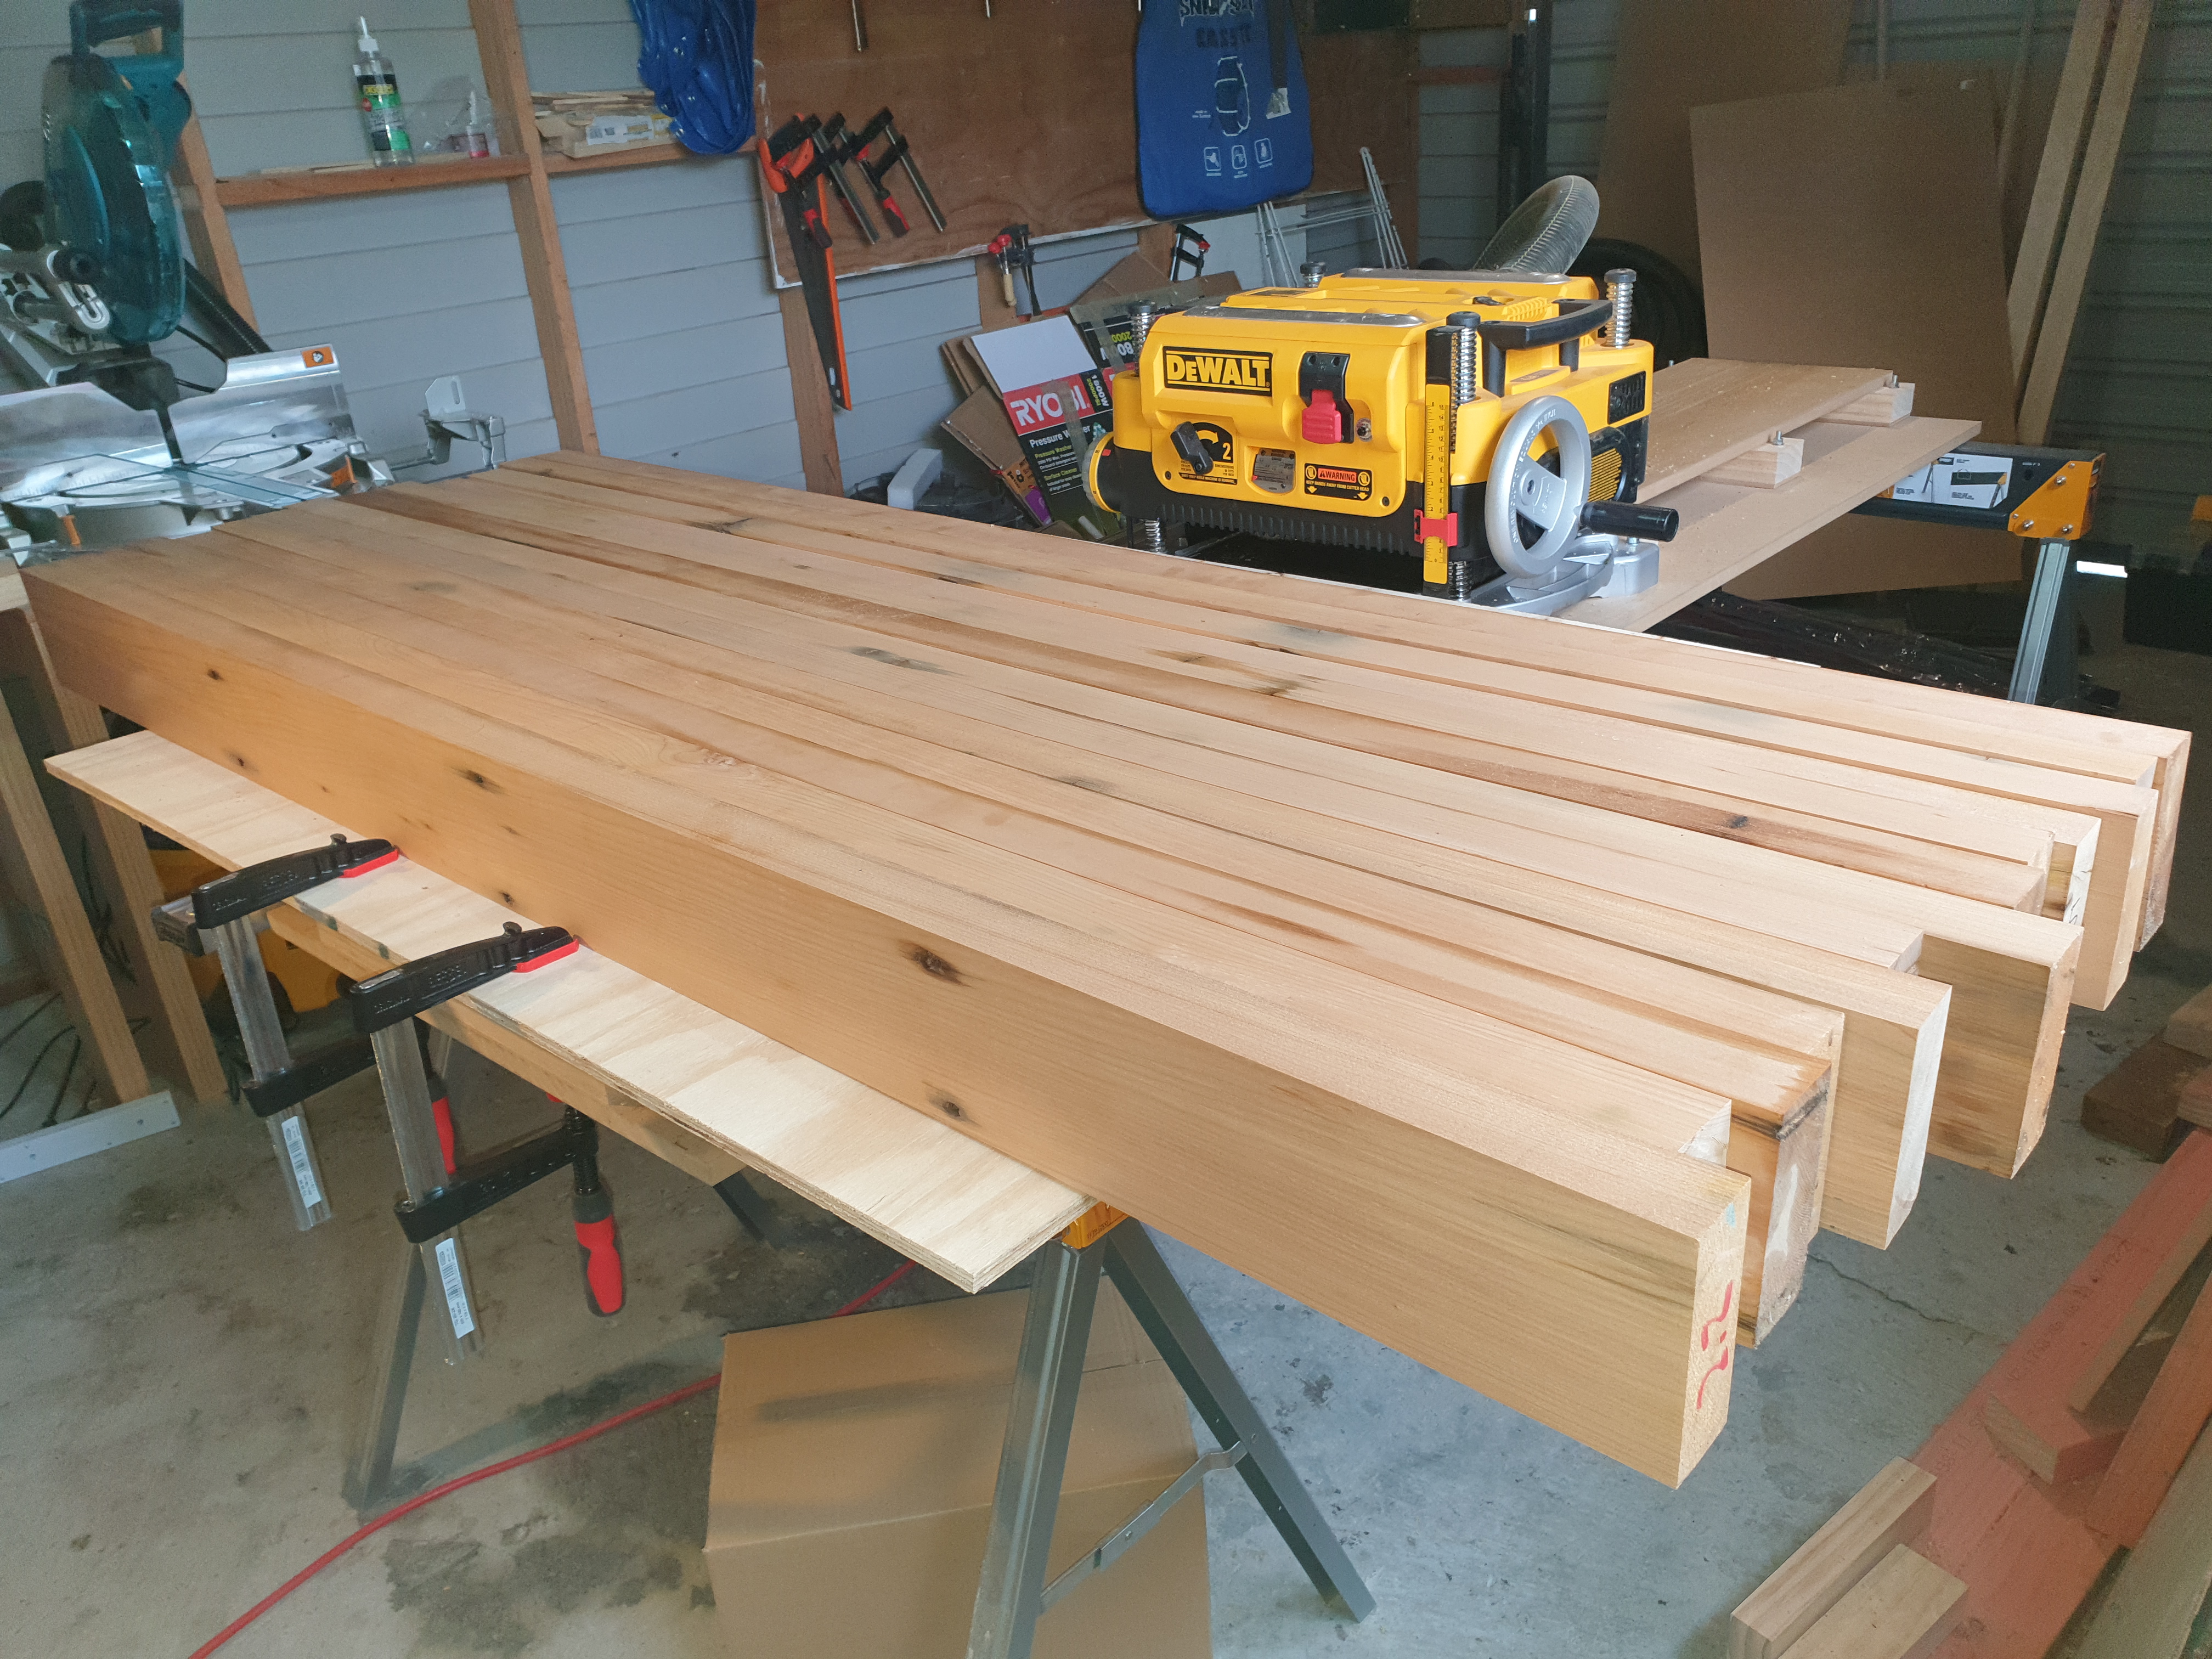
Now my timber was free of all metal objects, I could proceed with jointing ready for the glue-up. I do not own a jointer, so resorted both a jack plane and thicknesser (planer) sled for the jointing. I used the jack plane for edge jointing and the thicknesser (planer) sled for face jointing. The photo below shows the benchtop timber jointed ready for glue-up.
For part 2 of my simplified Roubo workbench build, see Simplified Roubo Workbench Build Part 2 - Laminating the Benchtop and Legs