How To Make Laminated Dowels With Different Wood Patterns

I had an idea to make laminated dowels with contrasting wood colours and patterns. They turned out great! I've never seen this done before in woodworking, so hopefully this will be useful to others. Keeping the ends of dowels exposed can add a bit of interest to your projects and patterned dowels adds even more interest.
Dowel Designs
The image below shows the dowel designs I decided to make. I also made a couple of standard dowels with contrasting colours ready for an upcoming project.

How To Make Laminated Dowels
Step 1 - Dimensioning and laminating
The first step in the process involves laminating together flat strips of wood, dimensioned to match the desired dowel diameter. I like to go slightly above the final dowel diameter, to allow for some material to be removed in the final sanding process. For example, for a 20mm [13/16"] dowel I would aim for a 21mmx21mm square length of laminated wood.
To get your strips of wood to the correct size for the lamination glue up, this will usually involve first ripping them down on a table saw and sending them through a thicknesser/planer.
To make the quartered dowel pattern you see above, I made this with an additional rip cut and glue up. After the rip cut, one length is rotated to get the quartered pattern. This also requires dimensioning the original rectangular strip of wood slightly wider to handle the kerf of the table saw blade .
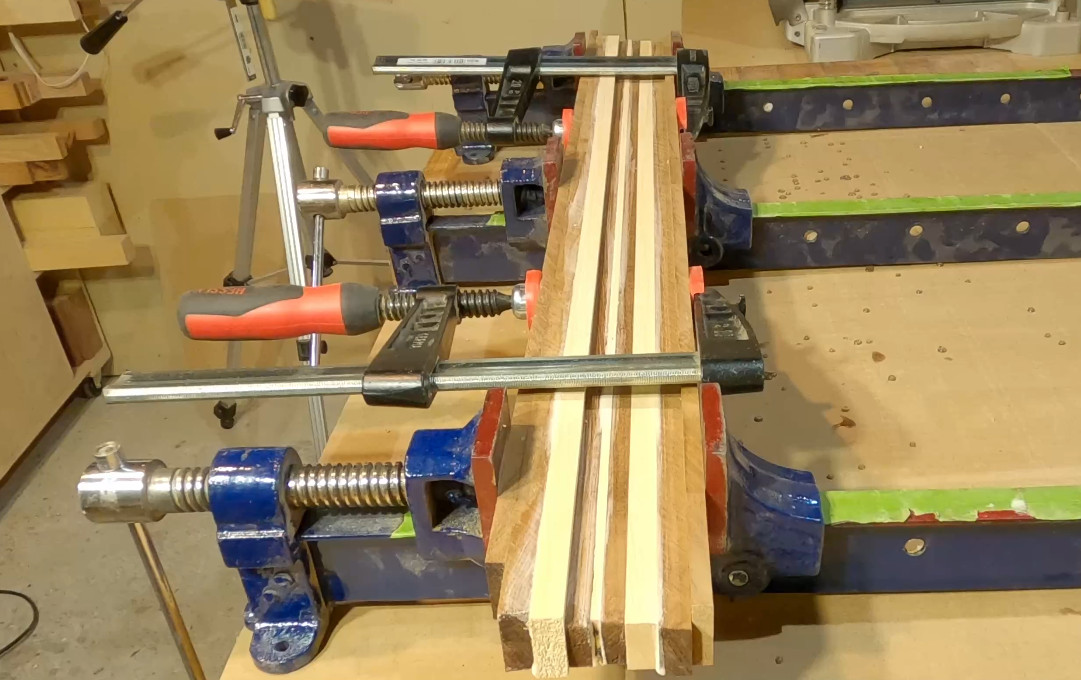
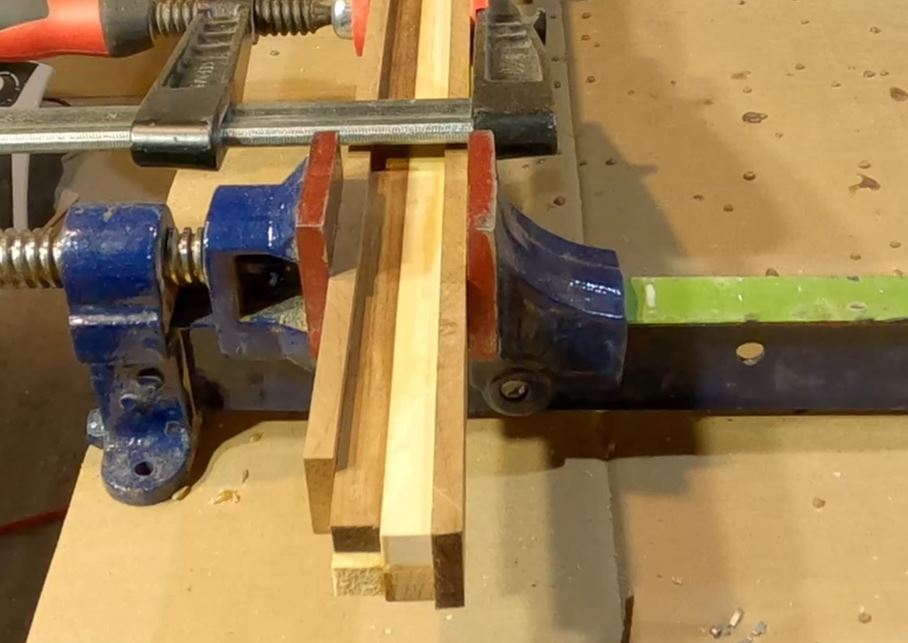
The first image below shows the first glue up for all dowel patterns above. You should be able to see the different dowel patterns, keeping in mind there are cauls on each side which are for protecting the wood from the clamps. The two lengths on the left will be ripped down again to get the quartered dowel pattern. which is why they are wider (taller as you look at them). See the second image below for the quartered dowel glue up.
Once all the glue ups have dried, remove any excess glue left on the surface. I use a paint scraper for this. Then plane each length down to the final dimension matching the size of dowel you are after. As mentioned above, I like to go slightly above the dowel diameter by about 1mm to allow for final sanding. It's also usually better to have a dowel slightly above the size you need than slightly below!
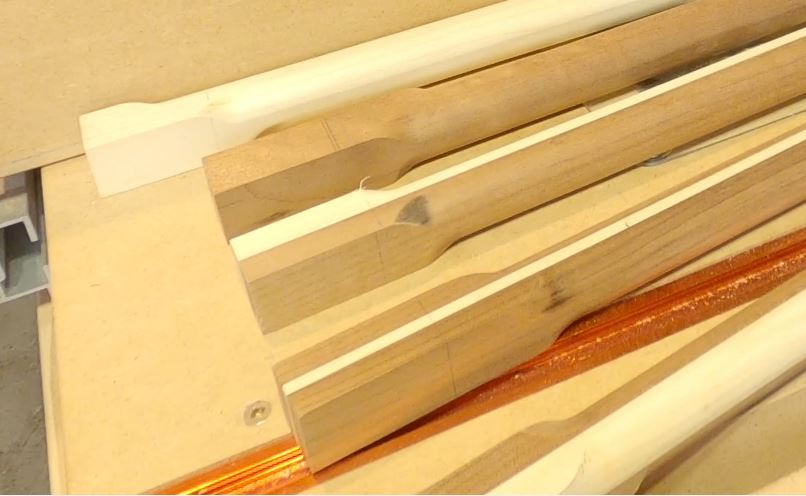
Each length of laminated wood should now be planed to the correct dimension and ready for the router table. The following photo shows the quartered dowel at this stage:
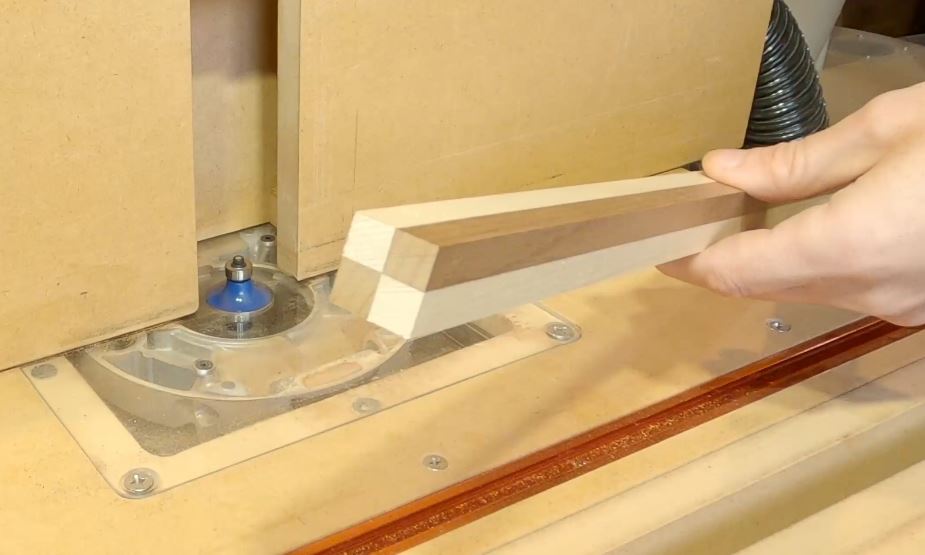
Step 2 - Routing the Dowels
The same rules apply here as routing standard, unlaminated dowels. First, you need to select a round over router bit of the correct size. The formula is simply: router bit radius = dowel diameter / 2. For example, for a 20mm dowel, the router bit would have a 10mm radius. The base of the router bit should be in line with the base of the router table and the top of the router bit should be in line with the fence.
A good method to prevent the dowel from rolling during routing, is to leave a square section at either end. If the entire dowel is less than the length of your router table fence, this means a flat section of the dowel is always aligned with the fence, preventing rolling. Use push blocks to keep the dowel pressed up against the router bit during routing. This will ensure a consistent result and is also safer than using your hands.
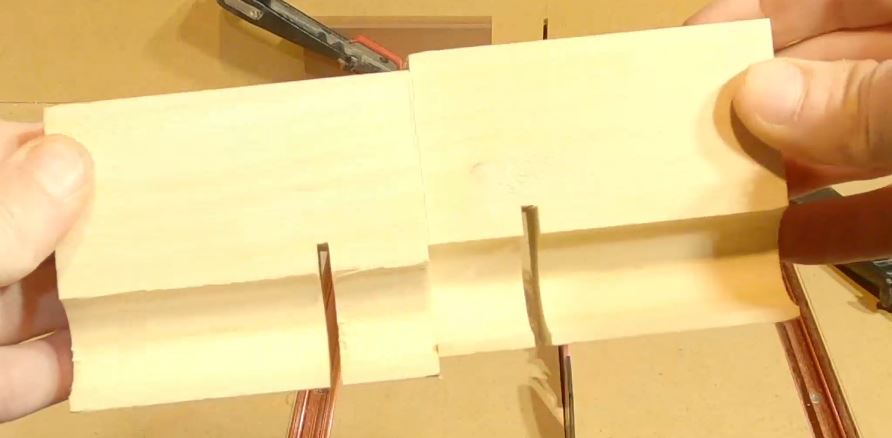
Once all four sides are routed, your dowels should look similar to this:
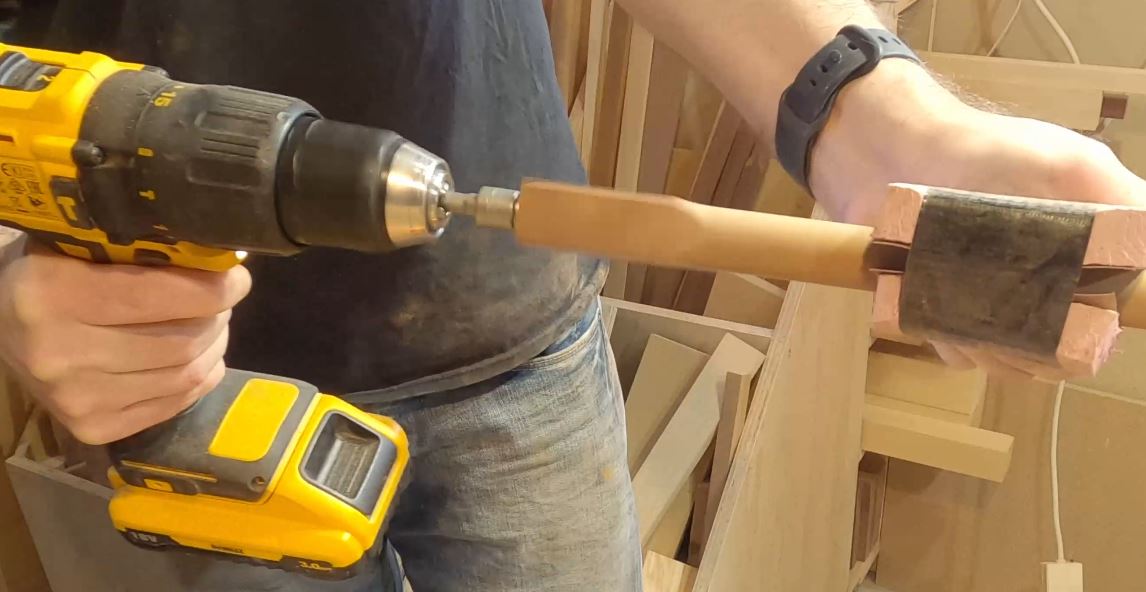
Step 3 - Sanding the Dowels
There will likely be some imperfections in the dowels after routing and these can be removed by sanding. One method is to wrap a section of sandpaper around the dowel and use hand sanding to clean it up. The method I like to use is to sandwich the dowel between two squares of foam or rubber, which each have self-adhesive sandpaper on one side. Then insert a hex-head screw into one end of the dowel and use my electric drill to spin the dowel through the two sections of foam. The photo below demonstrates how this works:
Step 4 - Cutting the Dowels
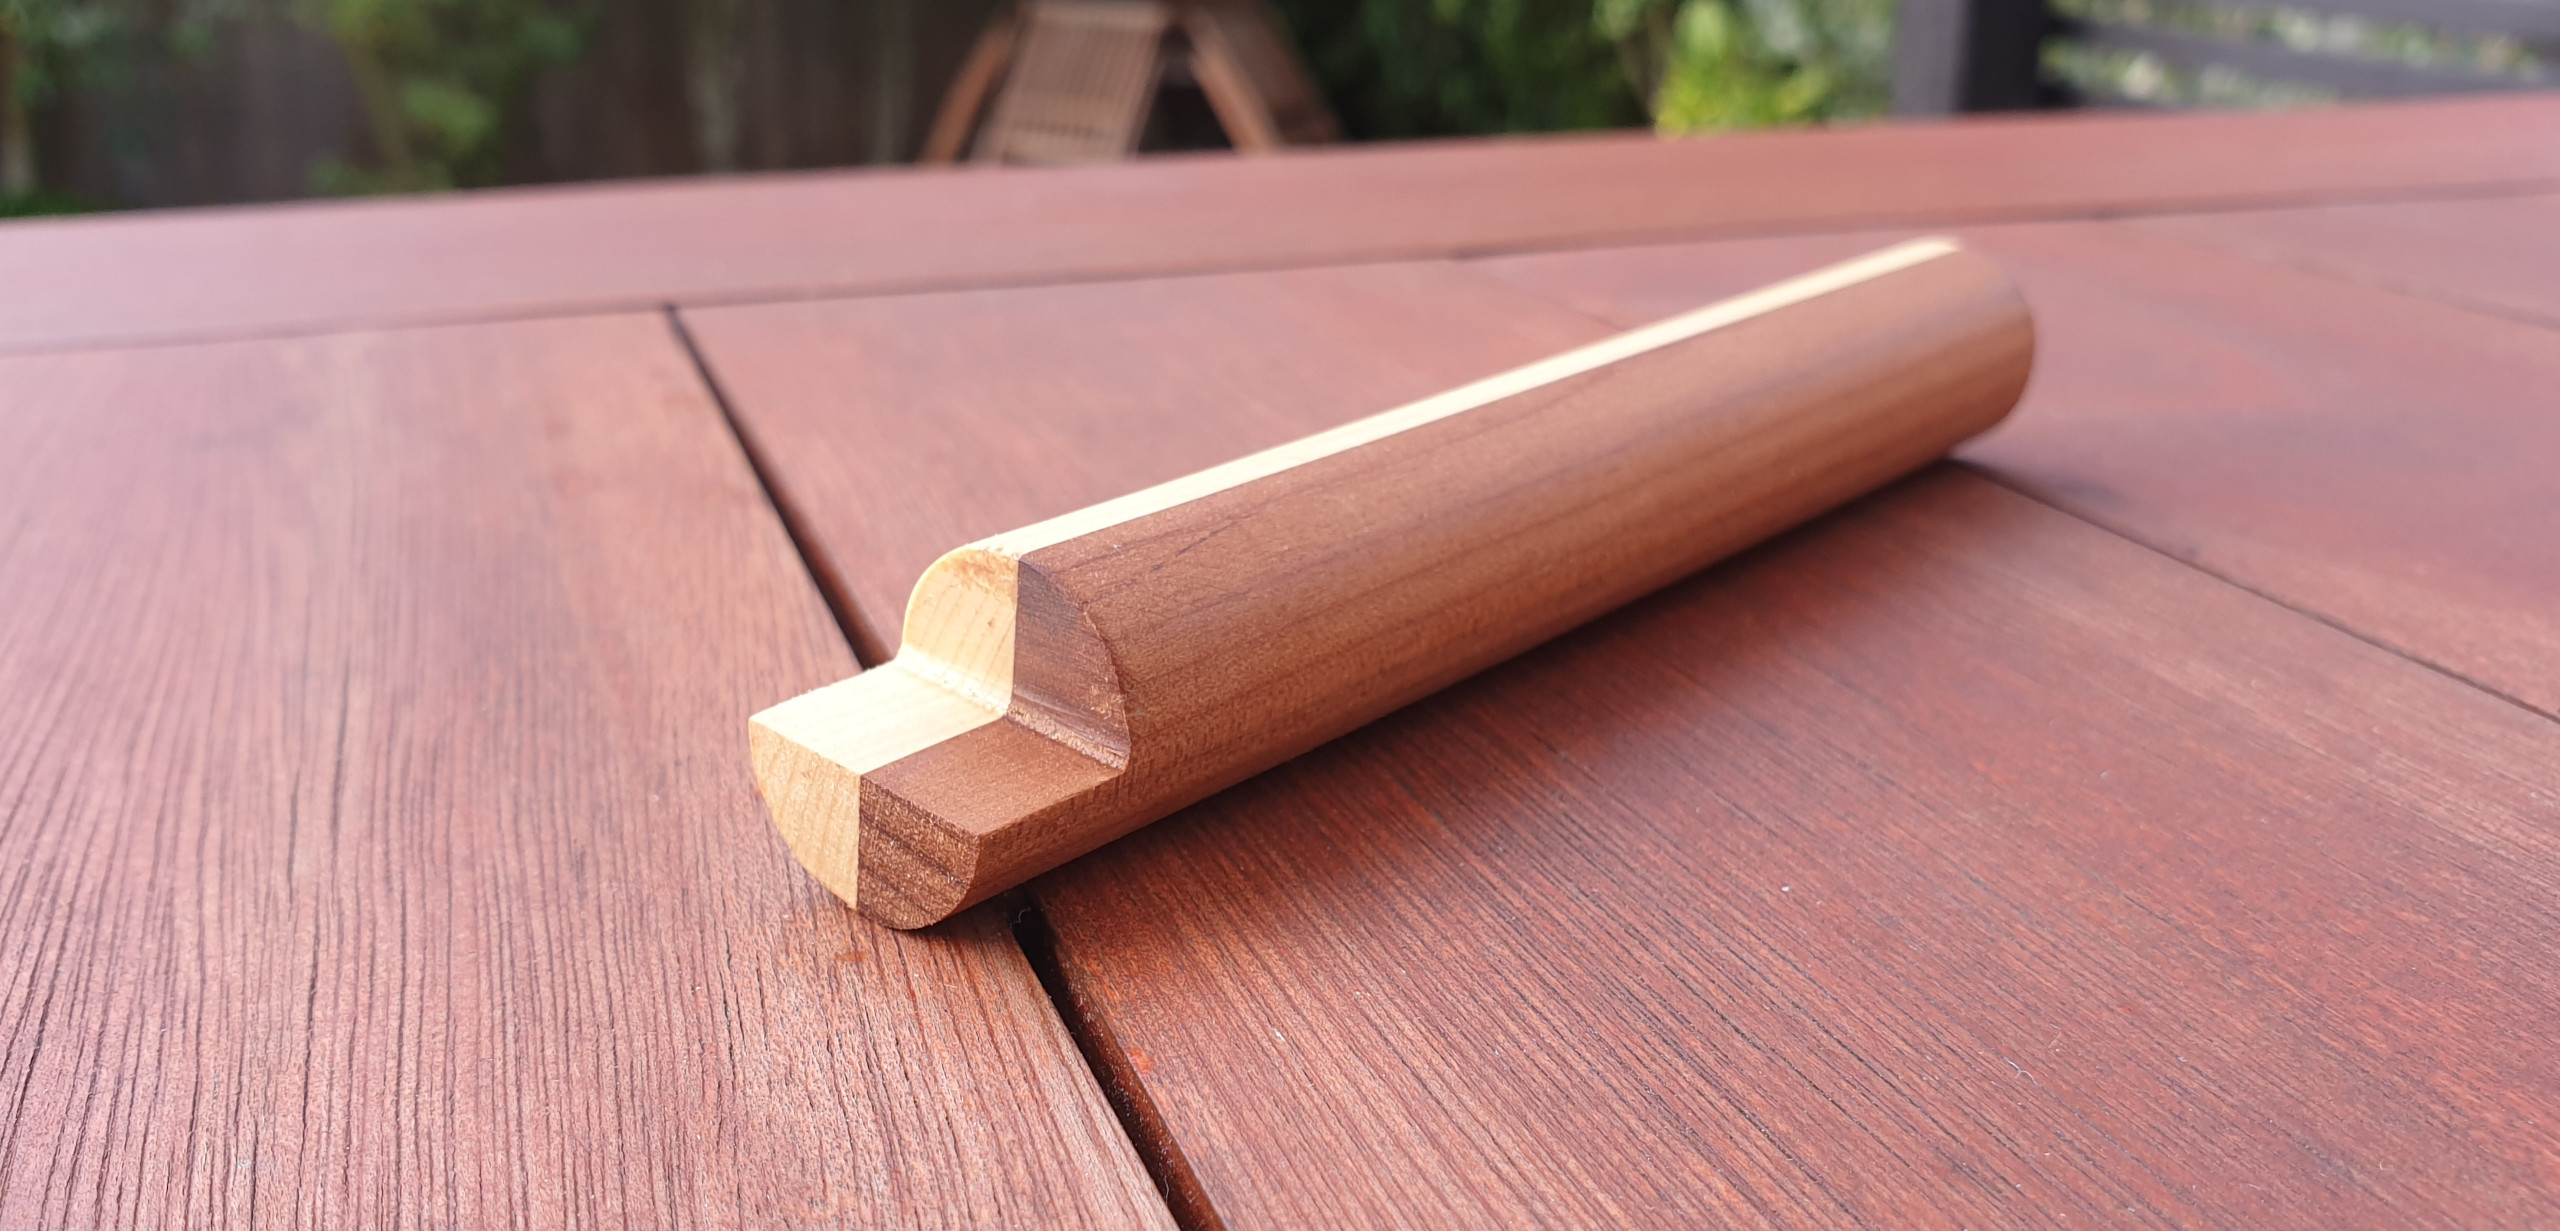
Once the dowels are sanded and the final dimension has been checked, it's time to cut off the square ends. You can either make the cuts with a hand saw and bench hook, miter saw or table saw. I like to use my table saw with a simple dowel cutting jig that prevents tear out. Not an issue for dowels that get completely hidden, but since we are making laminated dowels, they are obviously intended to be seen! The photos below show the dowel cutting jig:

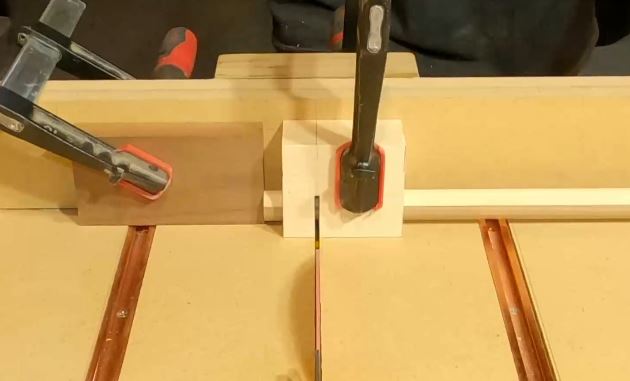
The half circle on each half of the jig, is sized to match the dowel you wish to cut. I also reduce the depth down by about 1mm on each half (as you can see in the second photo above). This means that when the jig is clamped in place, there is always a tight fit with the dowel and it will handle a dowel slightly above/below the target dimension. i.e., this jig is made for a 20mm dowel, but will work with a dowel between 18mm and 22mm.
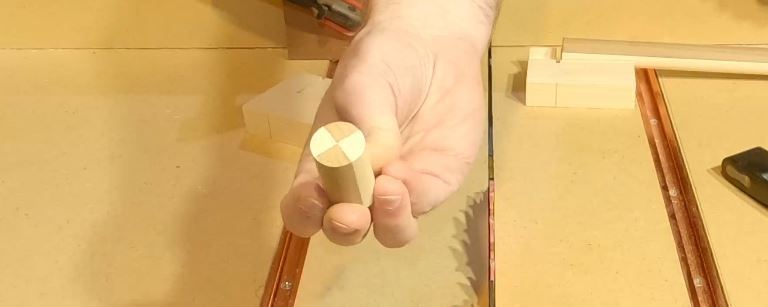
You should end up with a nice and clean cut as seen in the photo below:
Final Thoughts
I'm really pleased I started this project, since laminated dowels will add a new dimension to some of my future projects. My first thought was to create a two-tone bench dog from one of these dowels, which you can see in the photo below. Aside from aesthetics, it has a practical use in that it contrasts well against timber of any colour. Occasionally I have clipped the top of a bench dog the same colour as the wood I have been planing.
Make sure you also check out my YouTube video for this laminated dowel project.
If you have any comments or suggestions, please leave them below. Thanks!