Woodworking Spacers with Adjustable Design - Save Wood, Time and Money
Update June 13, 2022: I am applying for a patent for this design, but anyone is welcome to use it for personal use.
My wood storage cart was filling up with spacers cut to custom sizes and I decided there must be a better spacer solution. Especially since I would sometimes sacrifice perfectly good timber to cut a spacer to a specific size.
To start with I investigated to see if there was an adjustable spacer for woodworking available off the shelf. The closest I could find were bench cookies from Rockler but these are not really intended to be used as a spacer and can't be adjusted to specific heights.
Adjustable Spacer Design
After brainstorming a few designs, I settled on a simple idea, then jumped into Fusion 360 to model it out. The following image shows the spacer design I came up with.
The spacer design consists of two main parts:
- Fixed base made from 18mm [3/4"] MDF and an M8 [5/16"] tee nut
- Adjustable top made from 12mm MDF, M8 [5/16"] bolt, nut and washer
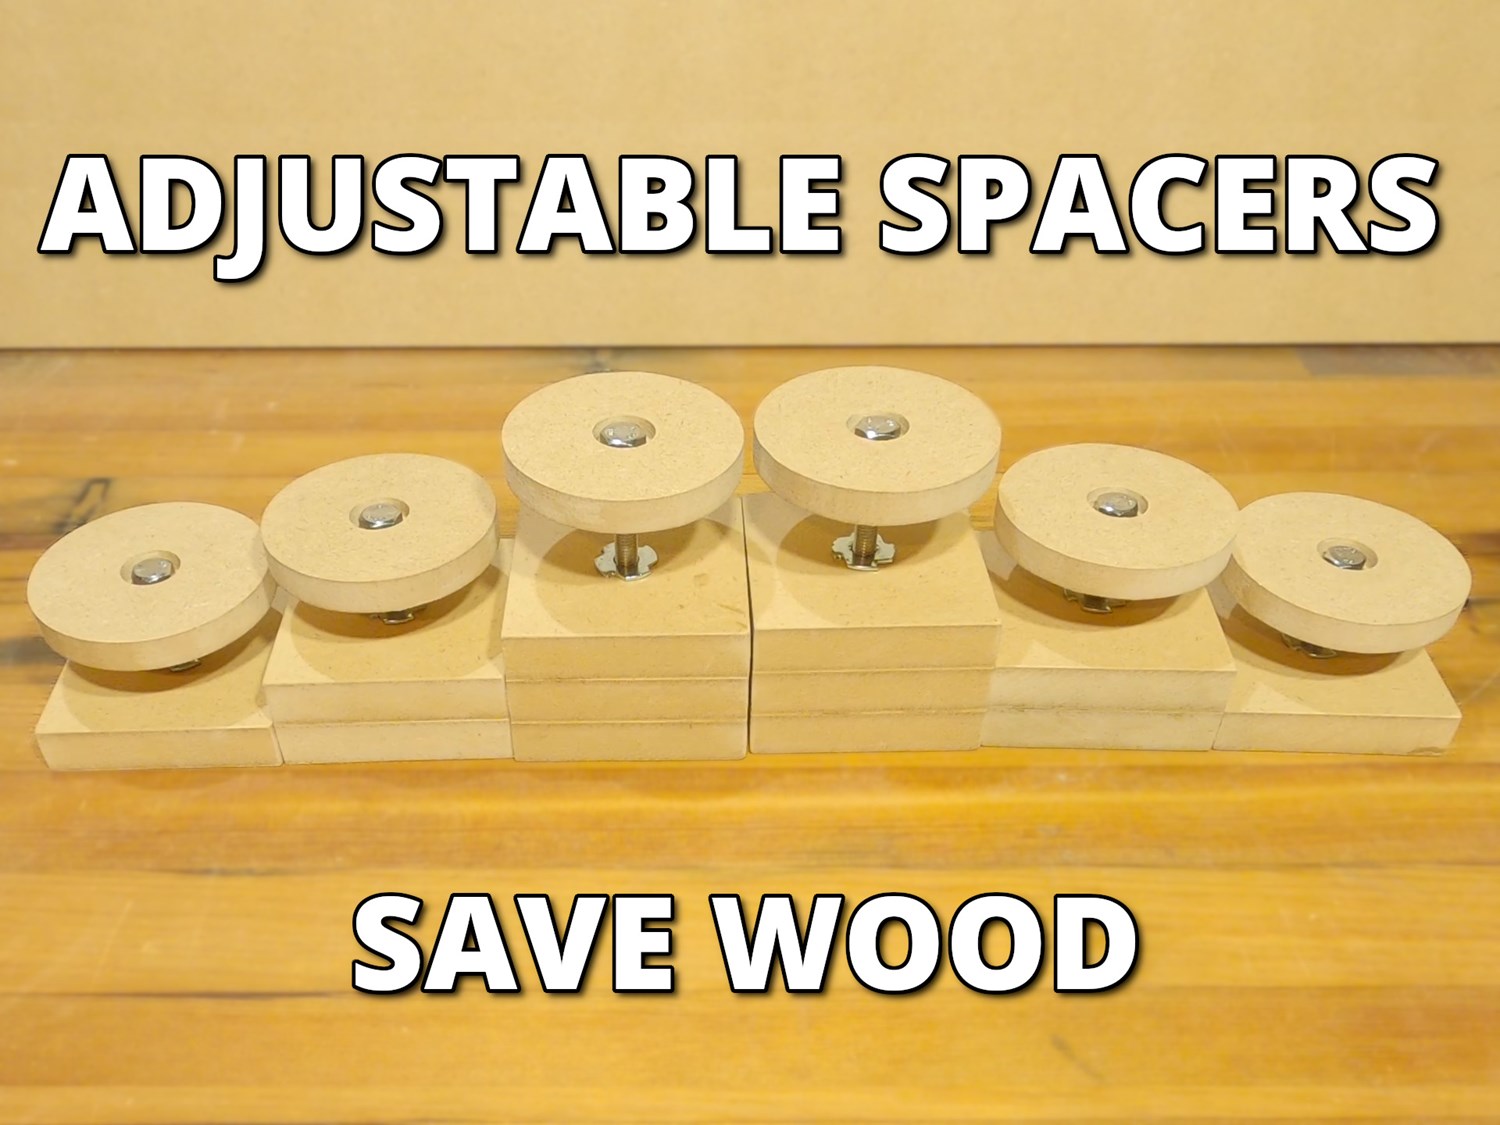
To cover a range of spacer heights/widths, I designed spacers at three different sizes. The following image shows the full range of spacer sizes I designed and built.
These spacers cover a range of 38mm to 127mm [1 1/2" to 5"]. Here are the specific size ranges for each spacer size:
- Small: 38mm - 56mm [1 1/2" - 2 3/16"]
- Medium: 56mm - 76mm [2 3/16" - 3"]
- Large: 76mm to 127mm [3" - 5"]
For spacers smaller than 36mm, I have some thin sections of MDF and hardboard that should cover most requirements. And if I need a spacer larger than 5", it would always be an option to stack these spacers together.
Spacer Applications
So far I have used these spacers for the following applications:
- Supporting stretchers at the correct height when fixing to table legs
- Making drawers with pocket holes - supporting the drawer base at the required height when inserting screws into the bottom
- Preventing vise racking - adjust the spacer to the same width of the wood to be clamped then clamp the spacer on the opposite side of the vise
Final thoughts
Overall, I'm happy with this spacer design and I'm sure it will save time and money in the long run. There is one small problem with this design where the top of the spacer can rock slightly side to side. This can be remedied by adding an additional nut to the bolt and securing against the tee nut. This also prevents the spacer from moving once set at the correct height.
Make sure you check out the YouTube video for this adjustable spacer. It shows the spacer in action for all the applications listed above and also shows how I lock the spacer with an additional nut.