How To Make A Combined Spline And Box Joint Jig For The Router Table - Plans Available

If you are planning on getting into box making, you've probably seen both spline and box joint jigs. In this post I discuss a clever yet simple router table jig that can make both spline and box joints. No point in making two jigs when you can make just one!
Full build plans and the supplies list including product links are available here: https://www.kiwiworkshop.com/plans/spline-and-box-joint-jig/
The Jig Design
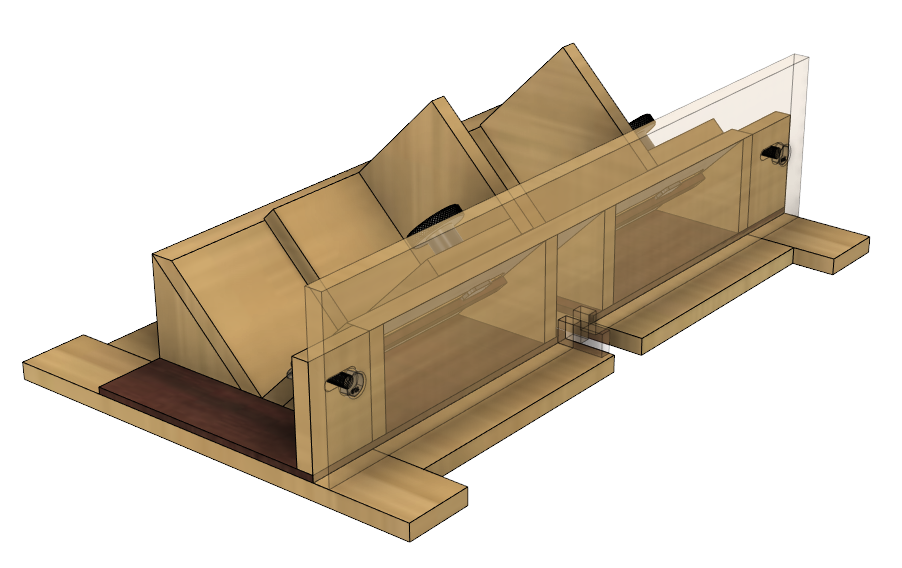
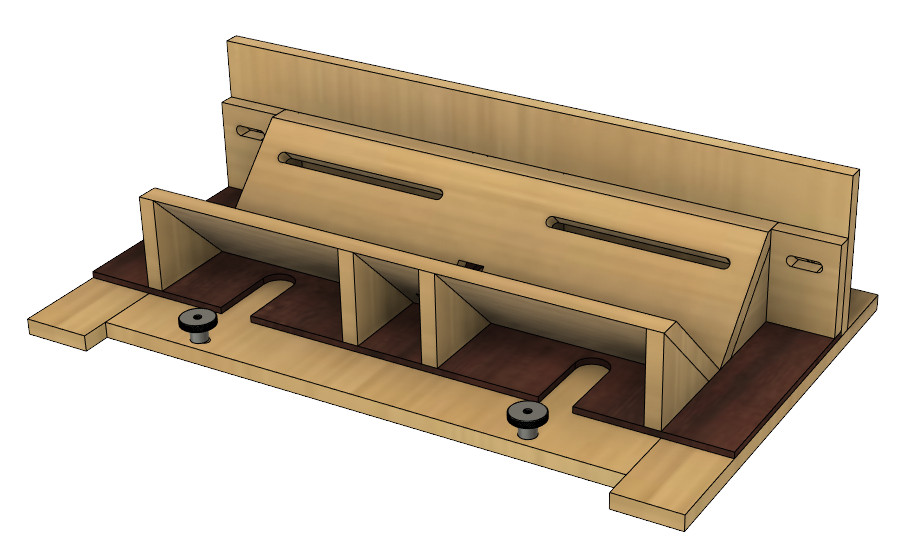
As seen in the image above, the jig is essentially a spline joint jig with a detachable box joint fence. The box joint fence is attached to the main jig body with hex screws and wingnuts. The detachable fence also makes it possible to support multiple fences for different sized joints.
An important design consideration was keeping the workpiece (box) down as close to the router bit as possible. Other router table jig designs I saw comprised of two layers of 18mm (3/4") material. Since this placed the workpiece 38mm (1 1/2") above the router table, a router bit with a very long shaft would be required and they are usually quite expensive. Since I also planned on making plans available for this jig, I didn't want people to be tempted to place a shorter router bit dangerously high in the collet. Since two layers of 18mm (3/4") material is overkill for this jig, I settled on a design comprising of one layer of 12mm (1/2") material for the fixed jig base and 5mm (3/16") hardboard for the main jig body. For spline joints, this means the workpiece is only 17mm (11/16") above the router table, not 38mm (1 1/2"). The thin hardboard does not compromise the strength of the jig, since it's glued to 12mm (1/2") material for the main jig body.
To accommodate different sized boxes when cutting splines, the jig was made wide enough to cover the largest jewelry box you would typically make plus about 30%. The spline clamps run in slots providing the flexibility to clamp different sized boxes. The box joint fence runs the length of the jig which is wider that you would ever likely need. The box joint fence supports also include slots which allows for fine tuning the box joint fence position when the jig is clamped in place.
For mounting the jig to the router table, this can either be achieved with T-Track, Clamps (i.e. F or trigger) or threaded inserts. There are two holes in the jig base that facilitate mounting into T-Track or threaded inserts with clamp knobs. The following image show the clamping locations:
Another important design consideration was the spacing between the jig and router bit. The jig will be centered over the router bit when cutting splines and pulled quite far back when cutting box joints. The plans for this build detail the idea jig position relative to the router bit for cutting both box joints and spline joints.
Jig Setup and Operation
For cutting spline joints, the jig is setup by simply clamping your box in the desired position between the two spline clamps. The horizontal position can either be measured or aligned by eye. Once the reference spline clamp is tightened in place, it will not be moved again until all joints on the box are cut. To make a cut, place one hand on top of the box to keep it firmly held down and place your other hand on the jig body. Push the box through the router bit in one steady pass. There is no need to pull the box back through the router bit and this could potentially widen the cut so is not recommended.
The jig setup for cutting box joints involves screwing the detachable box joint fence in place and ensuring it is perfectly flush with one edge of the jig. More details about the box joint fence setup are detailed in the build plans. This includes how to cut referencing pins and use them to setup the fence for different sized box joints. The same as for cutting splines, the cut should be made in one steady pass and the workpiece should not be pulled back through the router bit. As each slot is cut, the workpiece is lifted up, the fence is pulled back and the workpiece is slotted over the indexing pin. This is repeated until all fingers are cut.
For both spline and box joints, it's recommended to make test joints first to ensure the jig is setup correctly.
Final Thoughts
I'm really happy with how this jig turned out, especially since combining both spline and box joint capabilities into one jig did not hinder its operation in any way.
Make sure you also watch my Spline and Box Joint YouTube video. for this build. It includes the entire build process and you will get to see the jig in action making some boxes.
I'm happy to answer any questions you have about this jig, just drop me a message on the website contact page.