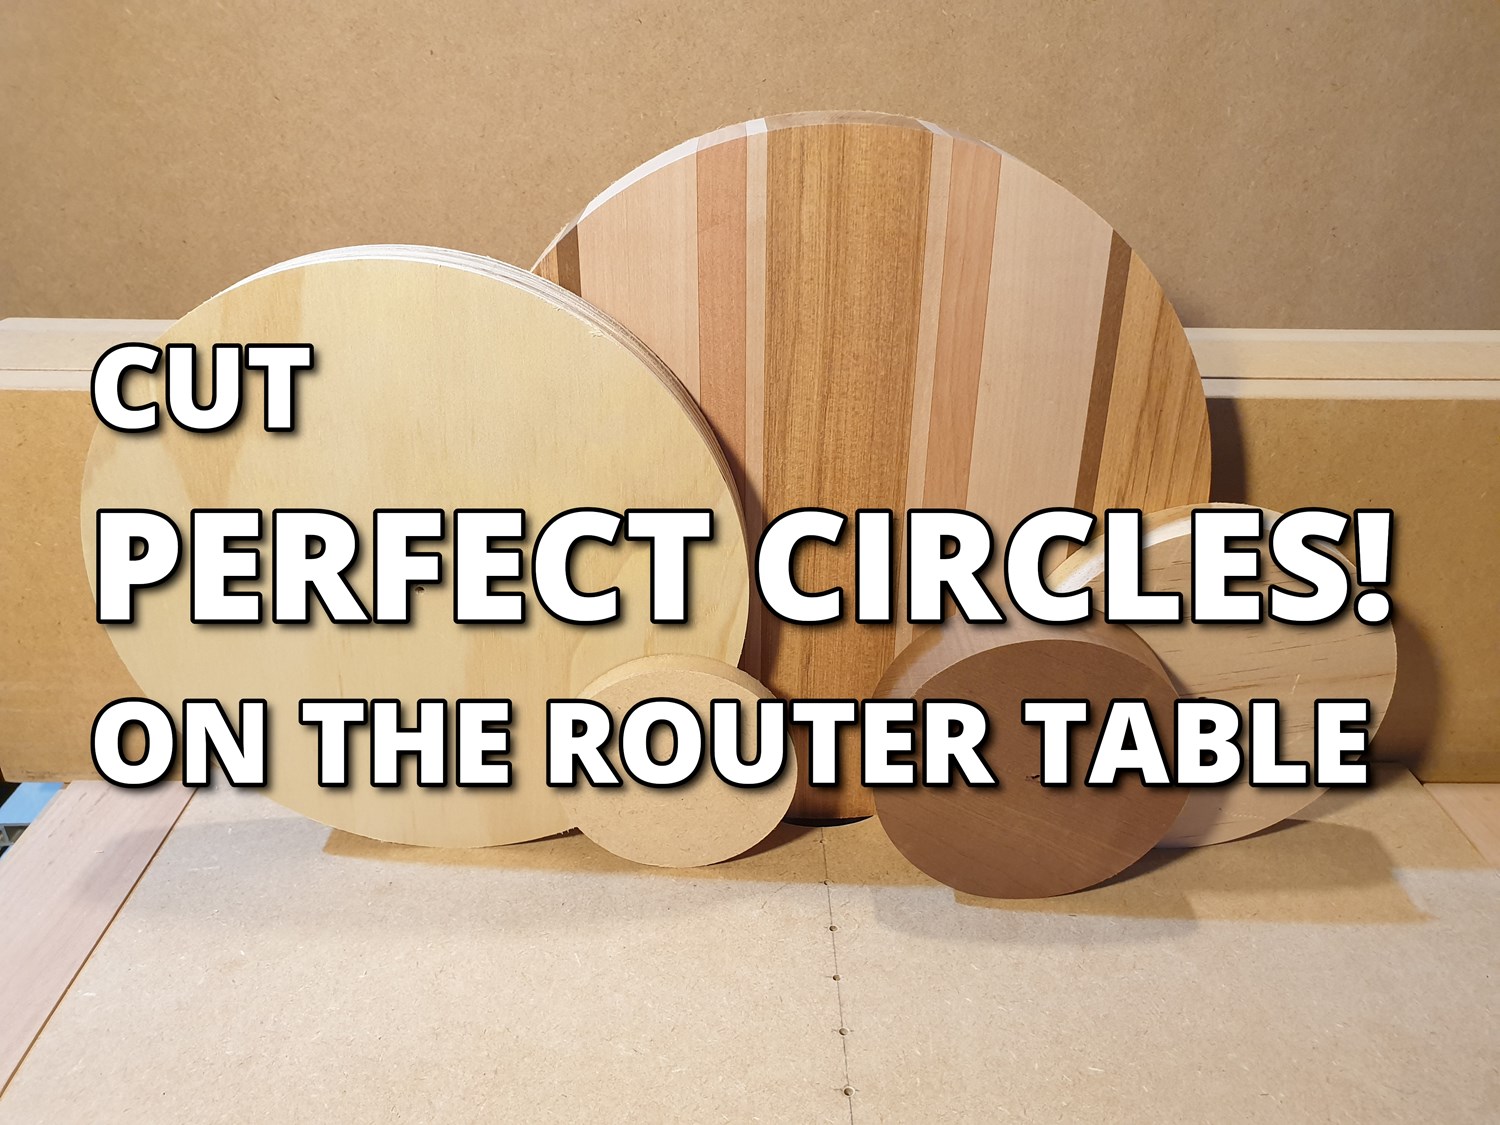
How to Cut Perfect Circles on the Router Table with a Simple Circle Jig
For one of my latest projects, I found myself reaching for the jigsaw to cut out a circle (disc). For this project it's the circular workpiece that I needed to keep. Previous experience told me the jigsaw option would result in a very rough circle that would need cleaning up afterwards. I investigated different methods of how to accurately cut circles and eventually decided my router table would give the best results, especially since I needed quite a small circle for my project (~70mm [2 3/4"] diameter). Using the router table would also provide the added benefit of dust collection. This solution would however involve building a jig. In this post I will cover the circle jig I built to work with my router table and how it works in two different modes of operation. I have also posted a YouTube video for this circle jig (click on the image above).
The Router Table Circle Jig Design
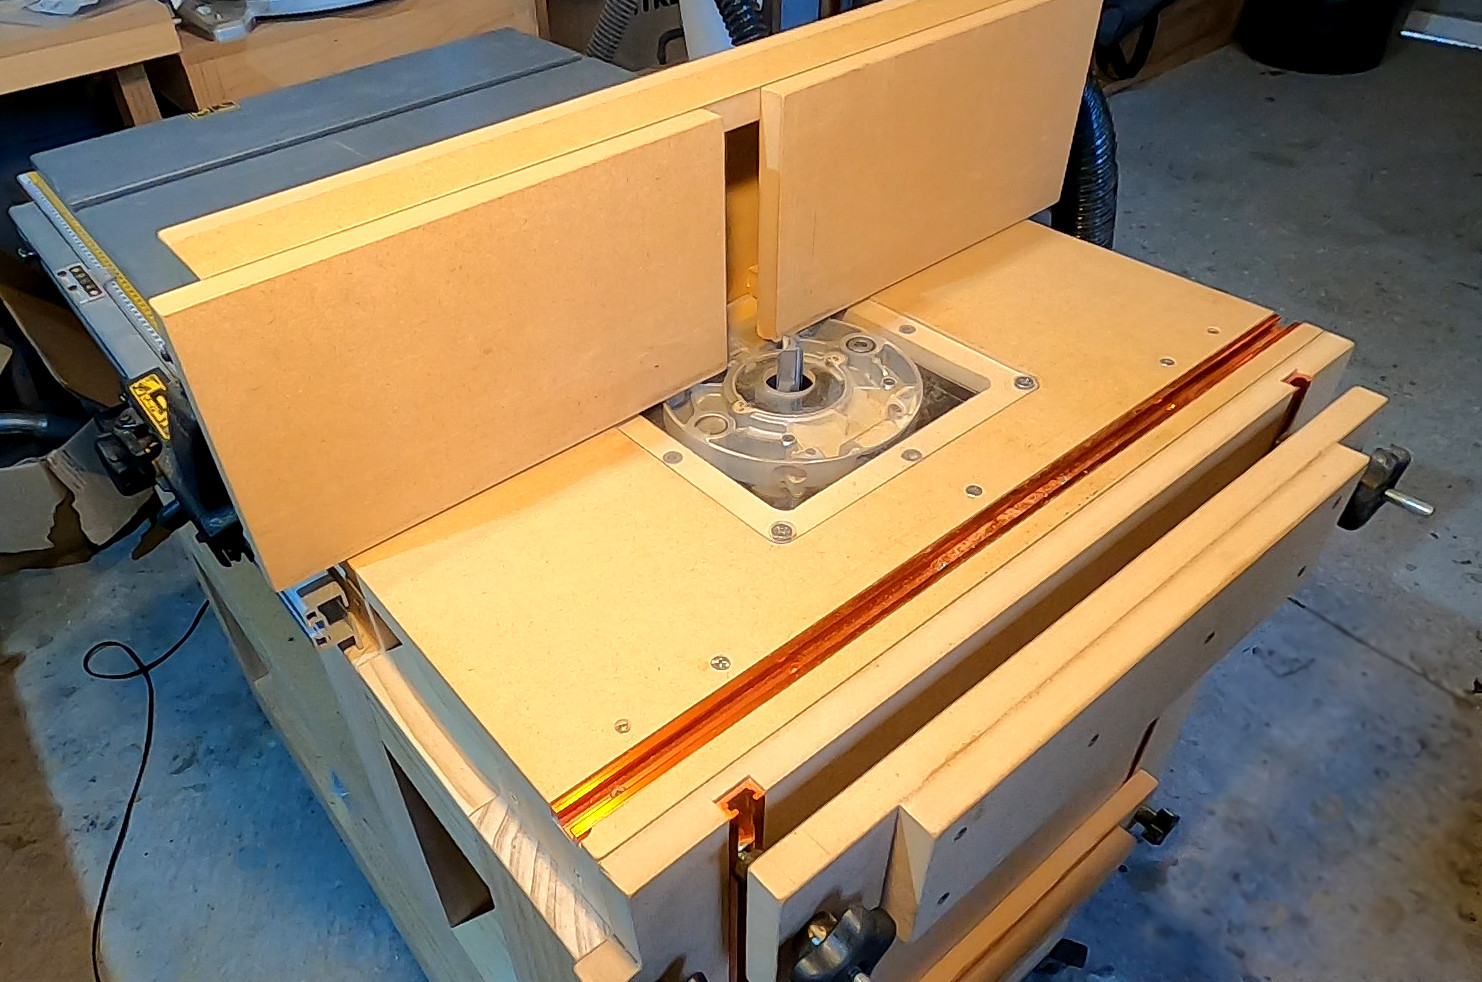
To start with, let's have a look at how my router table is setup. It's built into my table saw table which means the adjustable fence is dual purpose between my table saw and router table. Also note the T-Track which runs along the length of the router table and dust collection in the opening on the fence.
The circle jig will operate by rotating the workpiece at an adjustable distance from the router bit. To support this operation, the jig needs to support the following requirements:
- Ability to rotate the workpiece around a fixed origin
- The fixed origin needs to be adjustable along an x and y axis in relation to the router bit (y = front to back, x = left to right)
- The jig must be adjustable along the y axis only when the router is running. This will allow the work piece to be pushed in and out of the router bit.
For requirement #1, the jig will support two modes of operation:
- Mode 1 (fixed pin) - Rotate the workpiece around a fixed metal pin that passes through it's center. This will require drilling a hole in the workpiece.
- Mode 2 (turntable) - Rotate the workpiece on a turntable that sits on a metal pin. No hole is required in the workpiece for this this mode of operation. The workpiece will be held to the turntable with double sided tape.
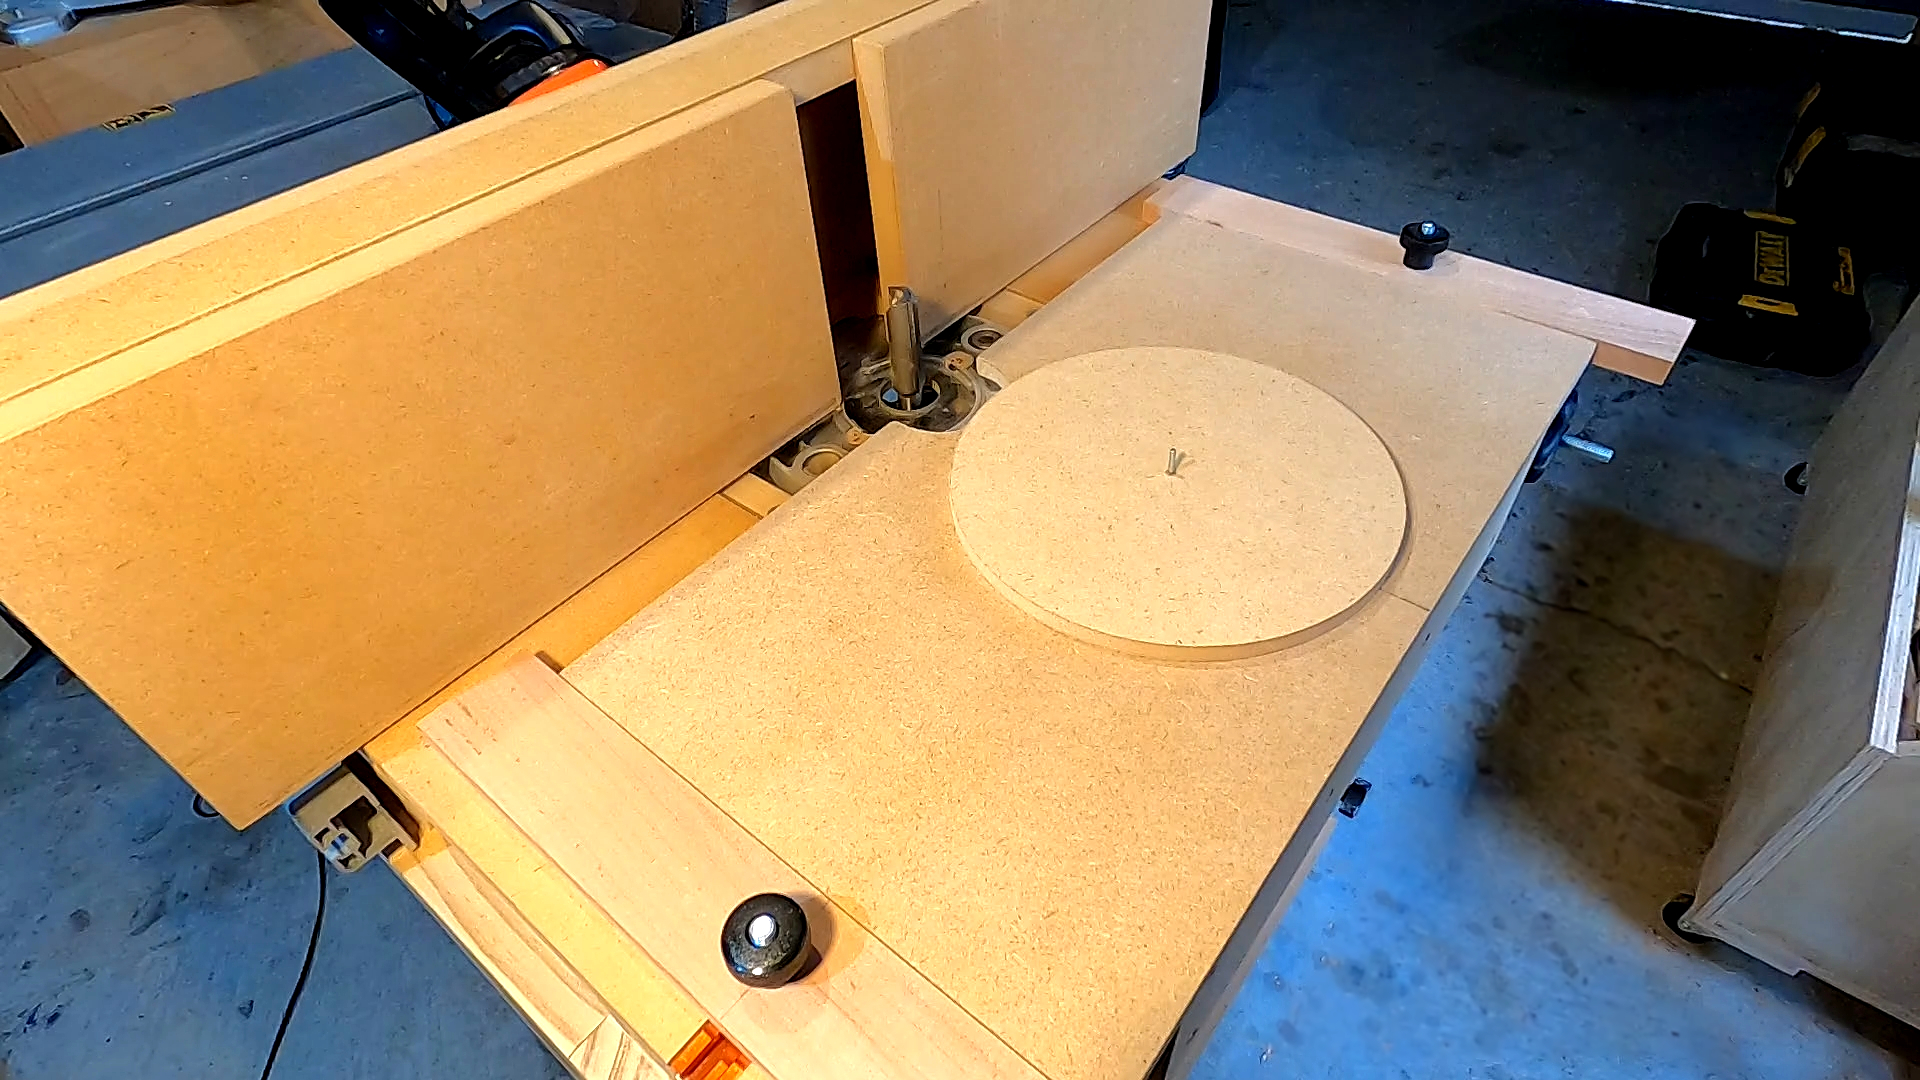
To support these requirements, I decided the main body of the jig will be MDF thick enough to support a small (~2.5mm [1/8"]) metal pin. I went with 12mm [1/2"] MDF. There will also be a row of holes drilled down the center of the jig body to allow placing the workpiece at different spacings from the front of the jig. This will support cutting circles at different sizes.
For requirements #2 and #3, I decided to use the router table T-Track for adjusting the circle jig along the x-axis. This will allow the row of pin holes to be perfectly aligned with the center of the router bit. And to support adjusting along the y-axis, I came up with a simple design that will allow the main body of the jig to slide between an rail each side that can be secured to the T-Track. The adjustable fence on the router table will also allow the fence to bet setup as a stop to prevent the work piece being pushed too far into the router bit. Here is what the jig looks like setup ready to route a circle from the work piece.
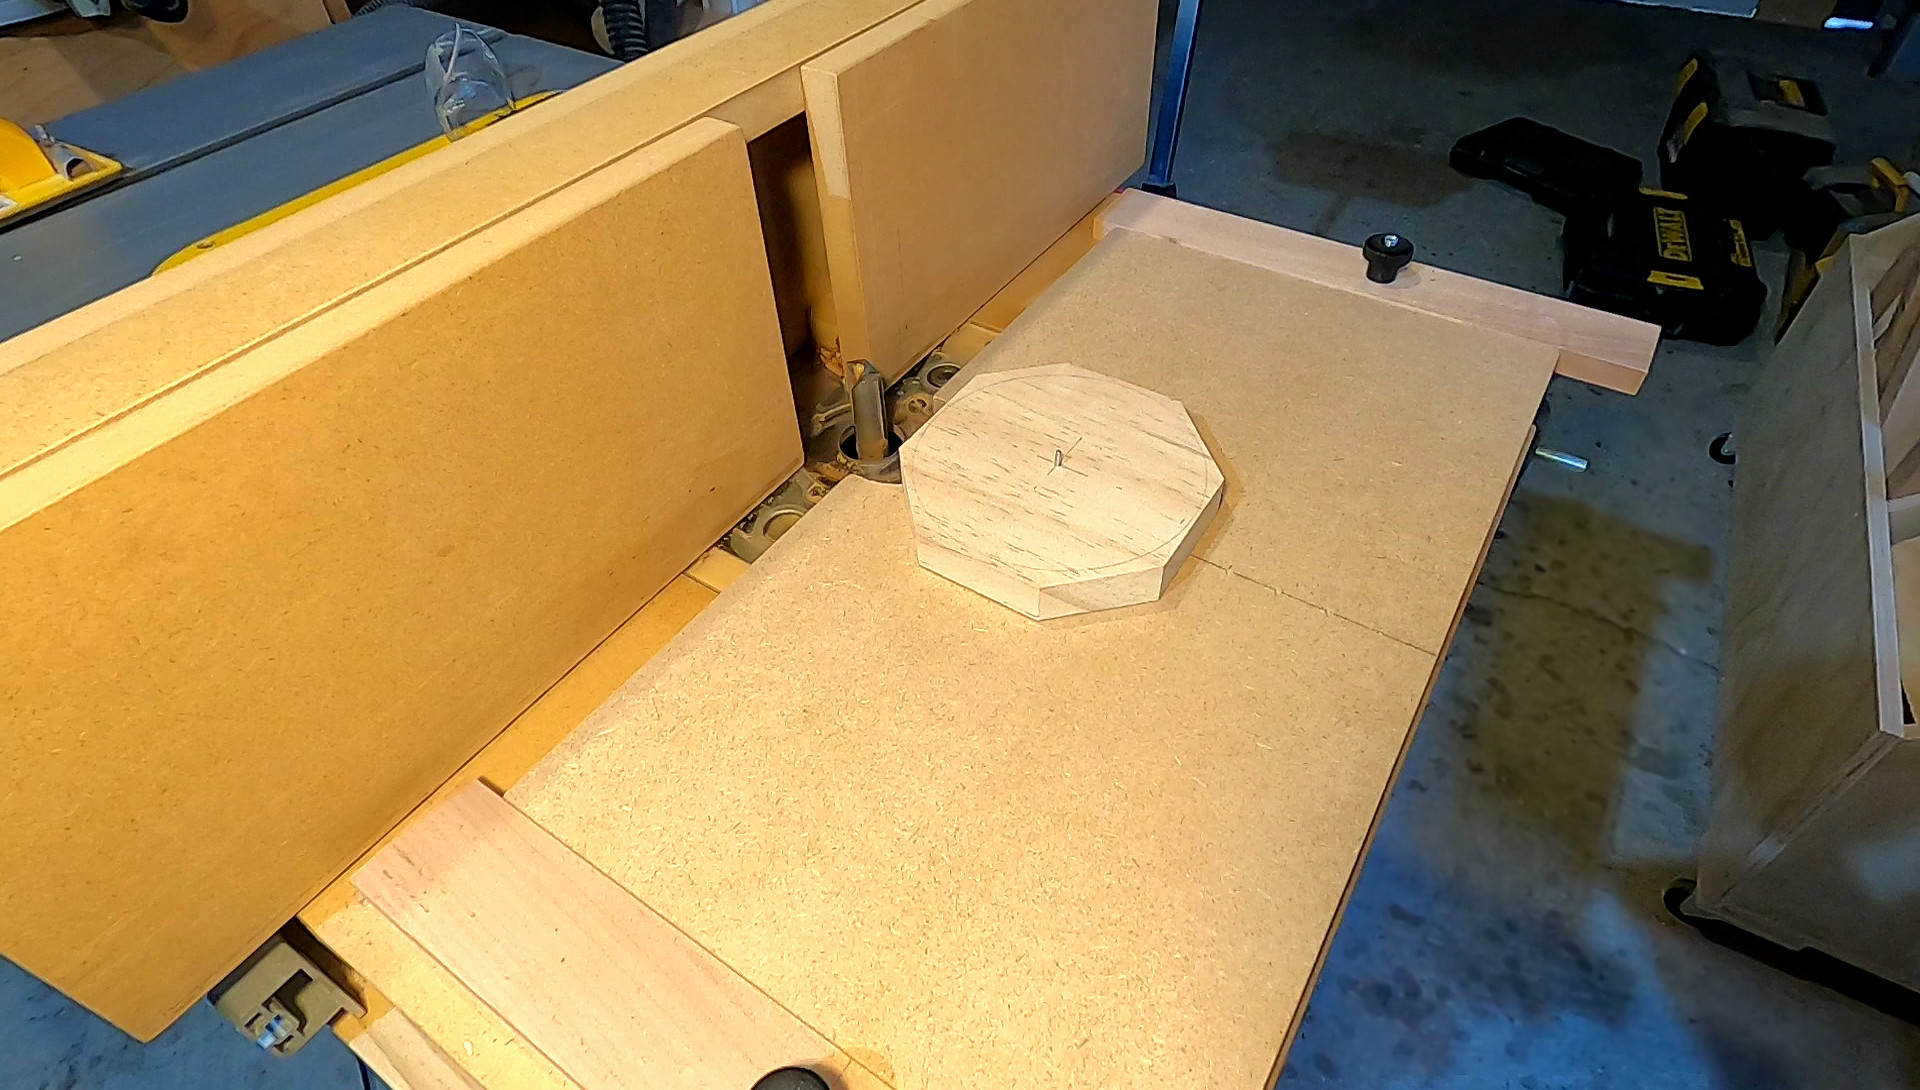
Once the main body of the jig is aligned with the center of the router bit, the rails each side are tightened into place on the T-Track. Since the main body of the jig is not attached to the rails, it can slide in and out towards and away from the router bit. This allows the work piece to be moved away from the router bit when the router is started (safety first!). While we are looking at this photo, it's worth mentioning why the work piece is cut in an octagonal shape. This is to ensure any material removed is less than the width of the router bit. The benefits of this are:
- All material can be removed in one pass
- It's safer, since all material removed will be turned into saw dust. If the material to be removed was wider than the width of the router bit, there would be a risk of creating small missiles that could shoot off at high speed!
Operating the Circle Jig in Fixed Pin Mode
With this mode of operation, the circle jig requires a hole to be drilled in the center of the work piece. The hole should be the same width as the metal pin used in the jig. As mentioned above, l used a 2.5mm [1/8"] metal pin. For additional safety to keep my fingers away from the router bit, I used a wooden dowel with a hole drilled in the end to keep the work piece pinned down against the jig. And a sanding block to rotate the workpiece into the router bit. Note that this should be in a counterclockwise direction! The following photo shows the circle jig being used in this mode of operation.
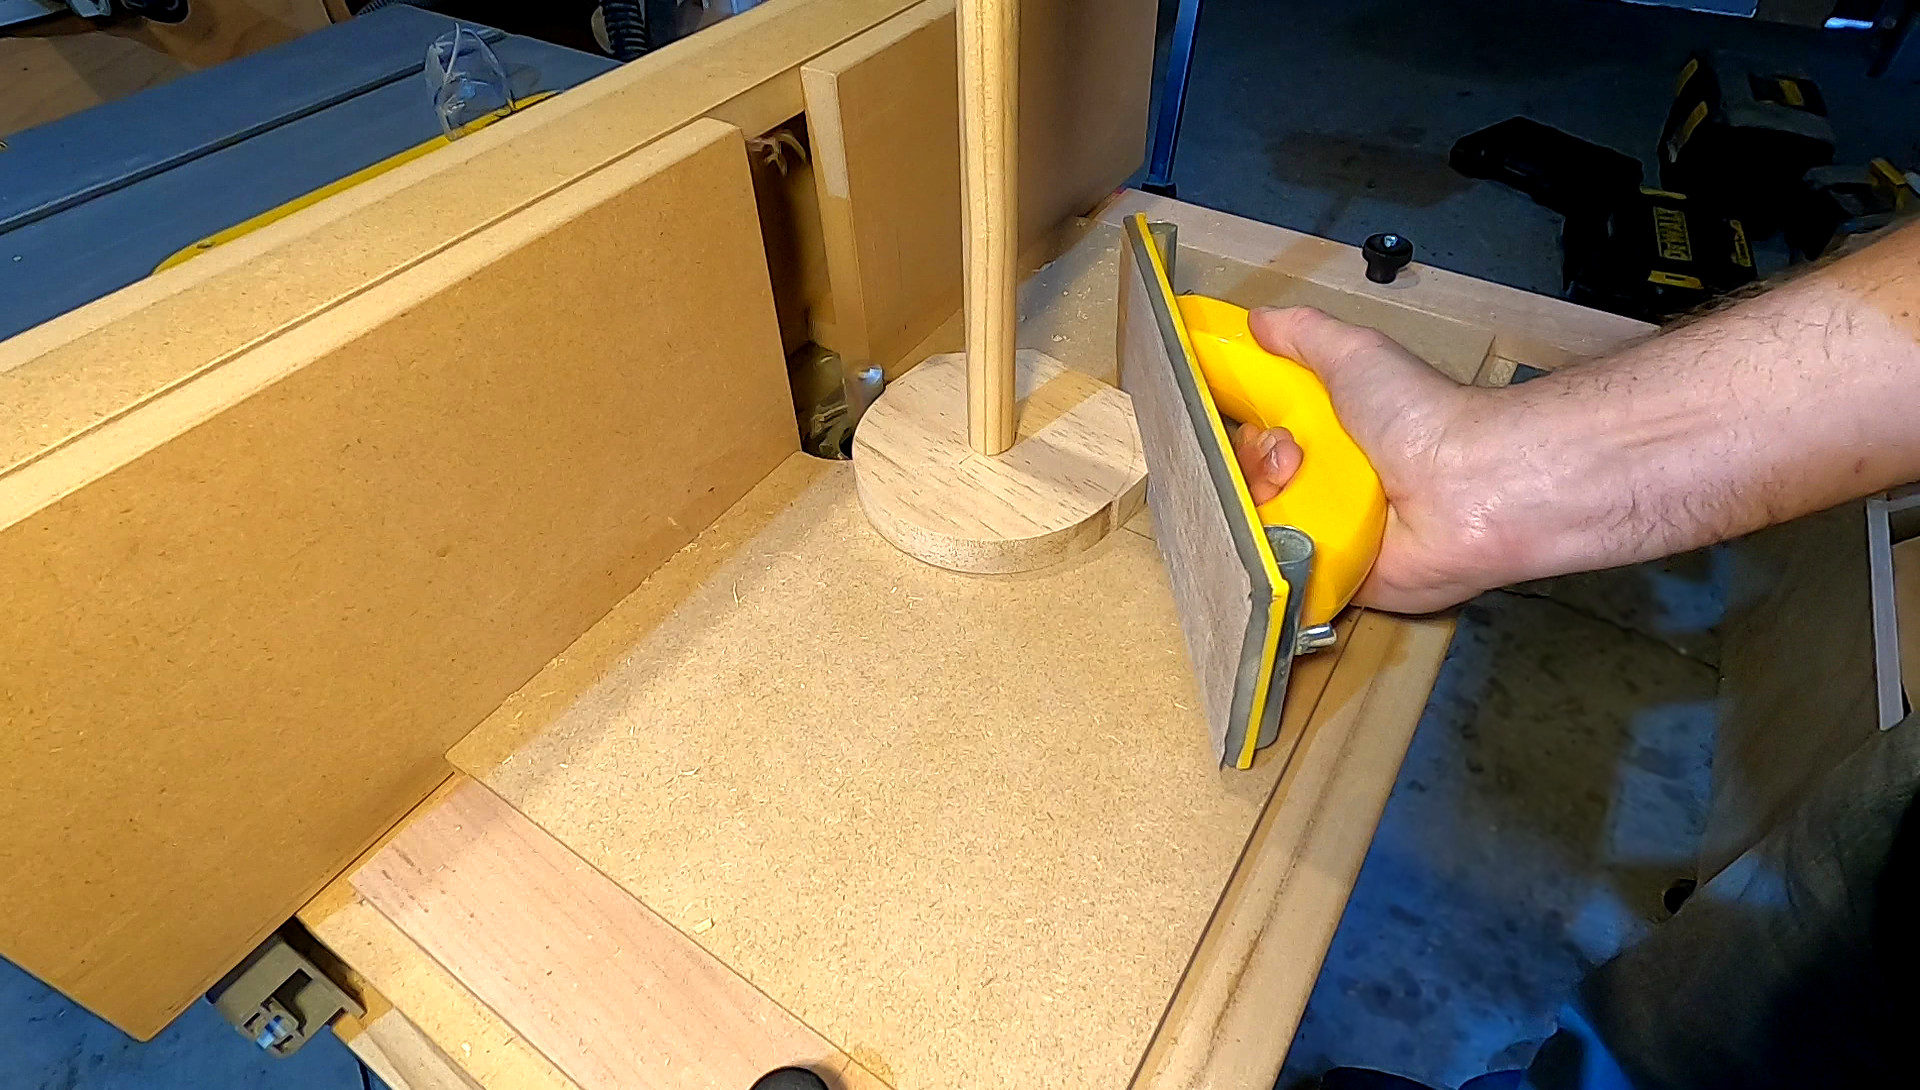
The body of the jig is pulled away from the router fence when the router is started. The jig and workpiece are then pushed in towards the router bit once the router is running. The fence is set at a distance so that the router bit is cutting on the perimeter of the required circle. I use the sanding block to push and pull on the body of the jig. The YouTube video for this jig shows how this works.
Operating the Circle Jig in Turntable Mode
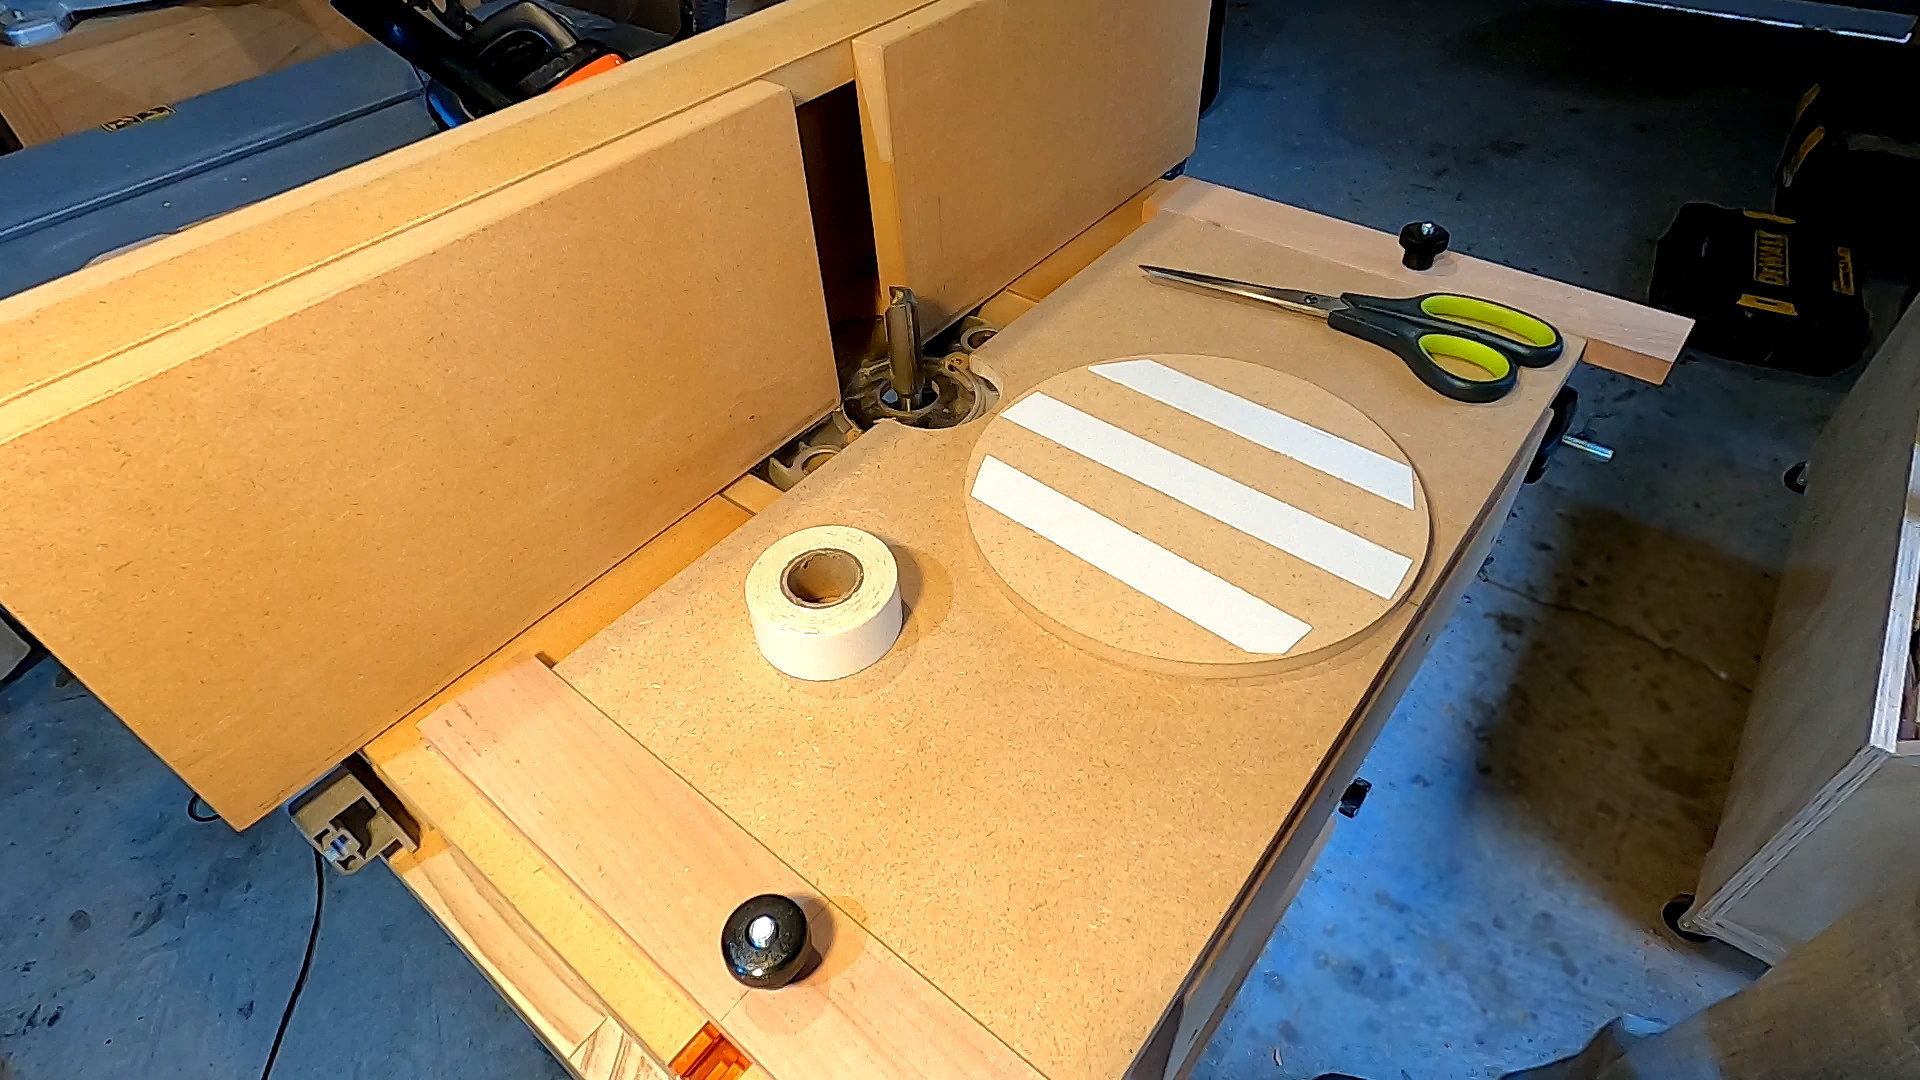
With this mode of operation, the workpiece rotates on a turntable and therefore does not require a hole drilled in the center. Ideal if you want a circular chopping/cutting board. The turntable is simply a disc with a metal pin fixed in the middle. It should be large enough to fully support the workpiece. The workpiece is attached to the turntable with double sided tape. The following photos show the turntable with the pin visible and with double sided tape applied.
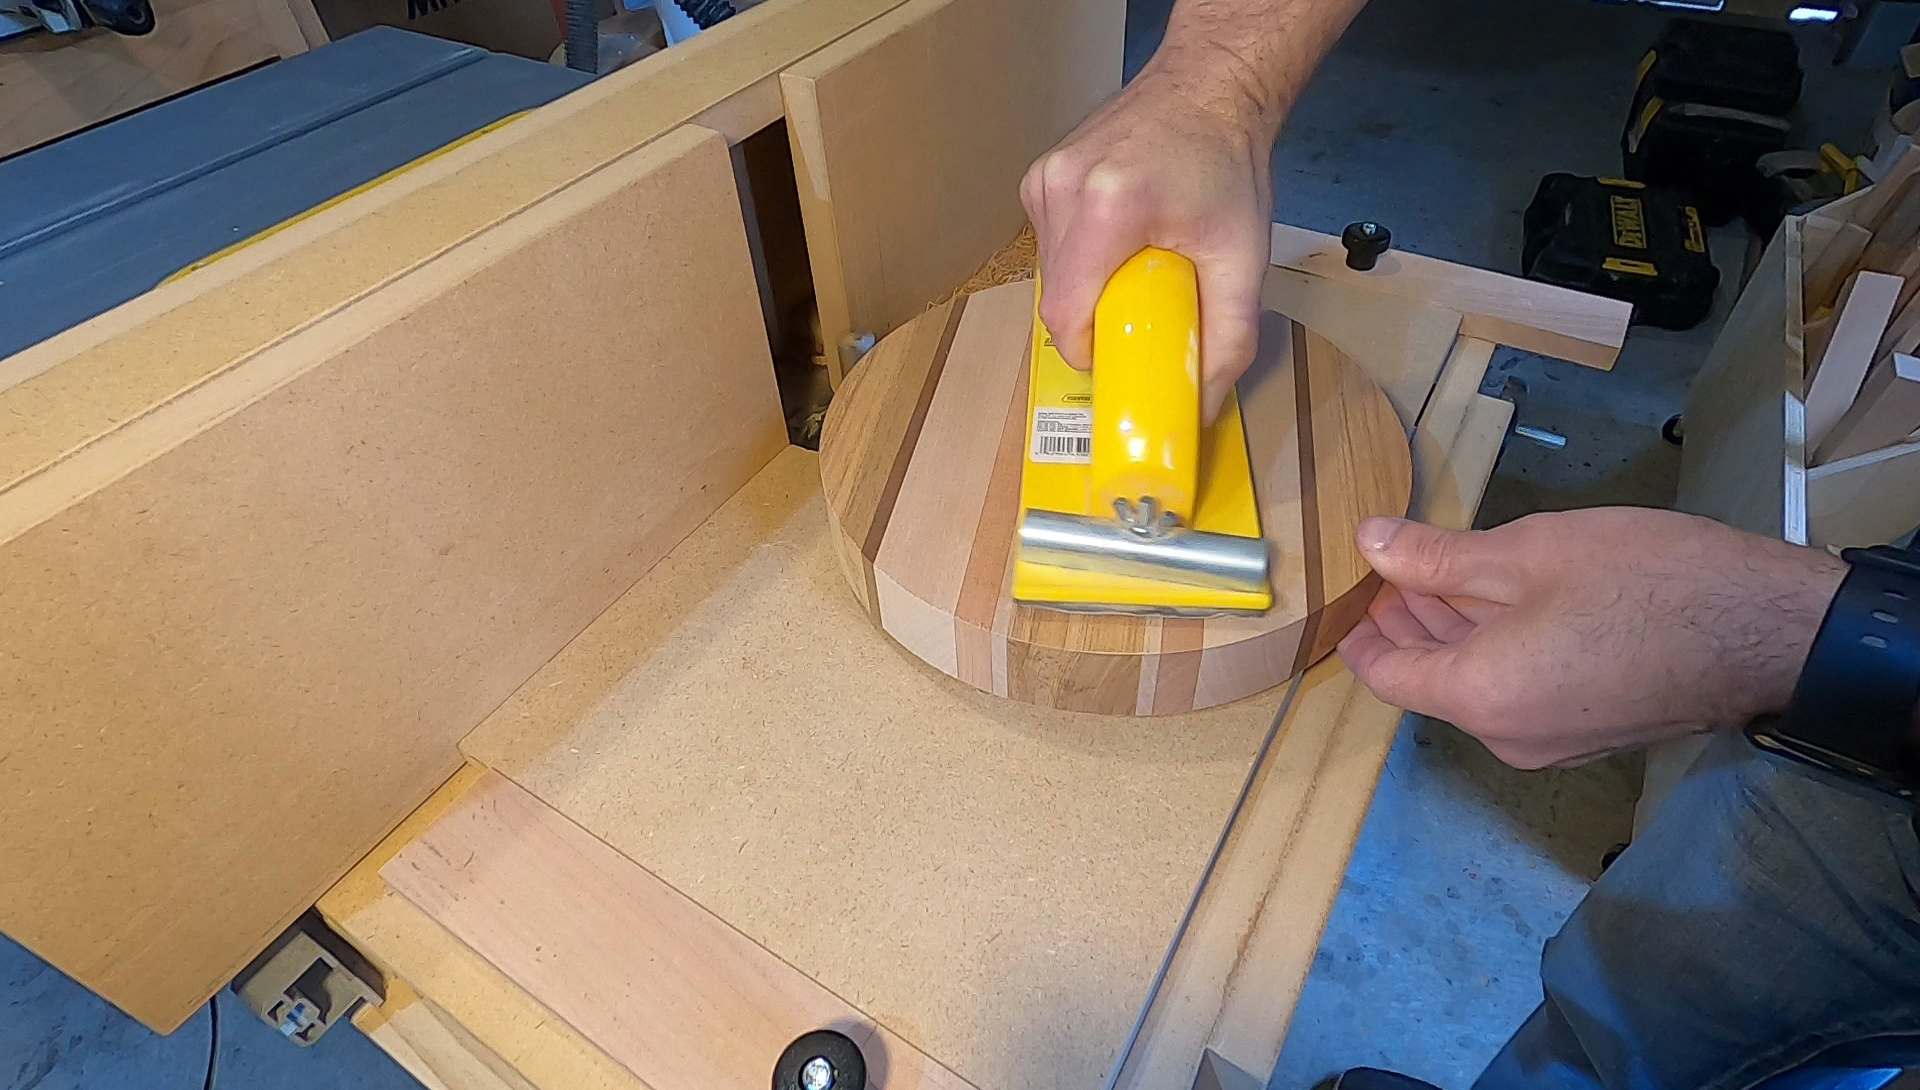
Once the turntable is setup and the workpiece attached to the double-sided tape, I use a sanding block to both hold the workpiece down and rotate it (counterclockwise) into the router bit. In the following photo, I'm routing a circular cutting board. The result was nice and smooth!
If a juice groove is required, this could also be achieved with this jig by carefully lowering the turntable onto the router bit set at the required depth. Although it would probably be best to route the groove in multiple shallow passes to prevent burning.
Final Thoughts
This project was very worthwhile given the great results and relatively short amount of time required to build the jig. No doubt I will use this jig many times for future projects. If I ever need a large circle beyond what is practical for this jig, I will probably make a large circle jig for my plunge router.
Make sure you also checkout the YouTube video for this router table circle jig. If anything wasn't clear in this post, it should become obvious after watching the video.