How To Build A Raised Planter Box With Polycarbonate Canopy - Plans Available

If you are planning on building a raised planter box for your garden, make sure you read this blog post first. I discuss the design I came up with to easily add a polycarbonate canopy to your planter. It creates a warm environment for growing vegetables for climate sensitive plants year-round.
Full build plans and the supplies list including product links are available here: https://www.kiwiworkshop.com/plans/raised-planter-box-with-canopy/
Step-by-step assembly instructions are also included in the build plans.
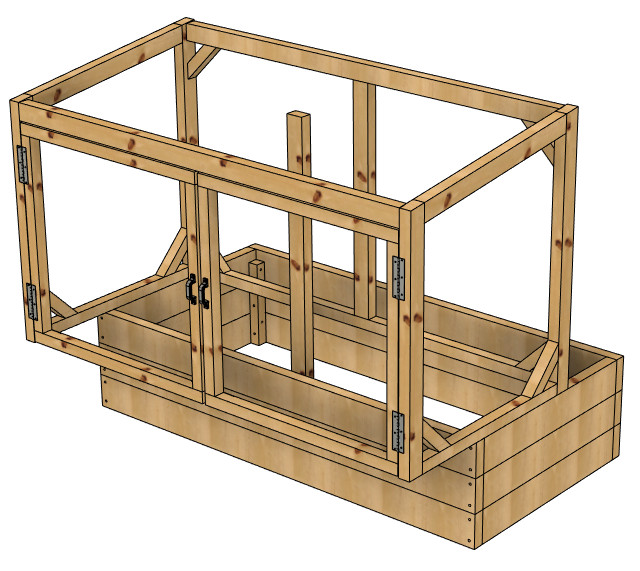
Planter Box Base Design
A standard planter box design was used for the base. The front and back panels are attached to the sides with butt joints and bugle head wood screws. To secure the base levels together, square posts are screwed into each corner. The height of the corner posts is reduced to a level where the planter soil will cover them.

Planter Box Upper Canopy Design
The upper canopy was designed to be built in place on the base, but still moveable so it can be slid forwards during the build. This will allow access to the back wall for installing the polycarbonate. It's attached to the base with two screws on each side and 2 screws in the center post. This also makes it easy to access the back of the planter if required in the future (i.e. create some space for painting the fence behind the planter). The following image shows how the upper canopy design is isolated from the base.
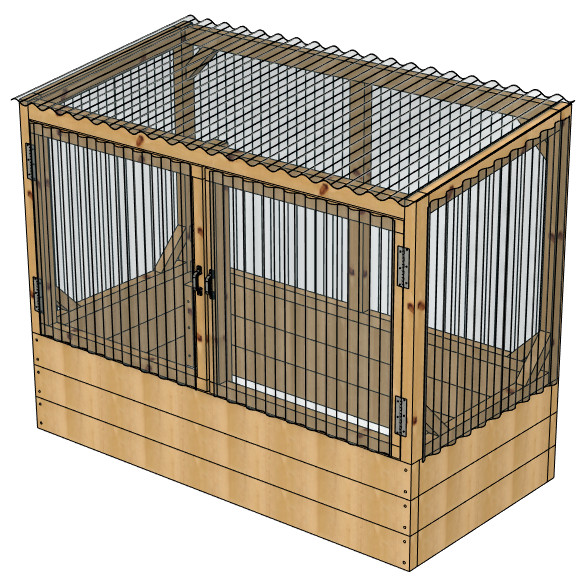
Once the back wall and roof polycarbonate is installed, the upper canopy can be slid back and screwed in place. For the polycarbonate, it's important to use roofing screws specifically for polycarbonate. Sometimes the polycarbonate manufacturer will provide a roofing screw specifically for their products.
The following image shows the finished planter box with the polycarbonate installed.
Final thoughts
I built this planter box for a friend and she is really happy with how it turned out. Three months after the build, she has a range of vegetables almost ready for harvest. It's worth mentioning that this was through a New Zealand winter! The planter box holds plenty of heat without all of the gaps in the polycarbonate corrugations being filled.
Regarding the design, I don't think I would change anything. It was easy to pre-assemble some of the parts off-site which helped with a reasonably fast final assembly. As mentioned above, if any maintenance is required to the fence behind the planter, it's just a matter of unscrewing a few screws then sliding the canopy forwards. The two-part design would also help with moving the planter box to a new location.
Make sure you watch the Planter Box YouTube Video for this build. It's reasonably fast since it was recorded as a time-lapse but should still give you a good idea of the build process.
I'm happy to answer any questions you have about this planter box, just drop me a message on the website contact page.
Daniel